How to Design and Install an IKEA PAX Wardrobe (Plus DIY Hacks!)
We are officially getting ready to celebrate 9 months of homeownership in the next couple weeks! Between house hunting in a pandemic, renovating our dream home, and finding out that I’m pregnant, you could describe this season of our life as a whirlwind. It has been such an exciting chapter filled with countless cardboard boxes, piles of paint-stained clothes, and trips to and from Home Depot.
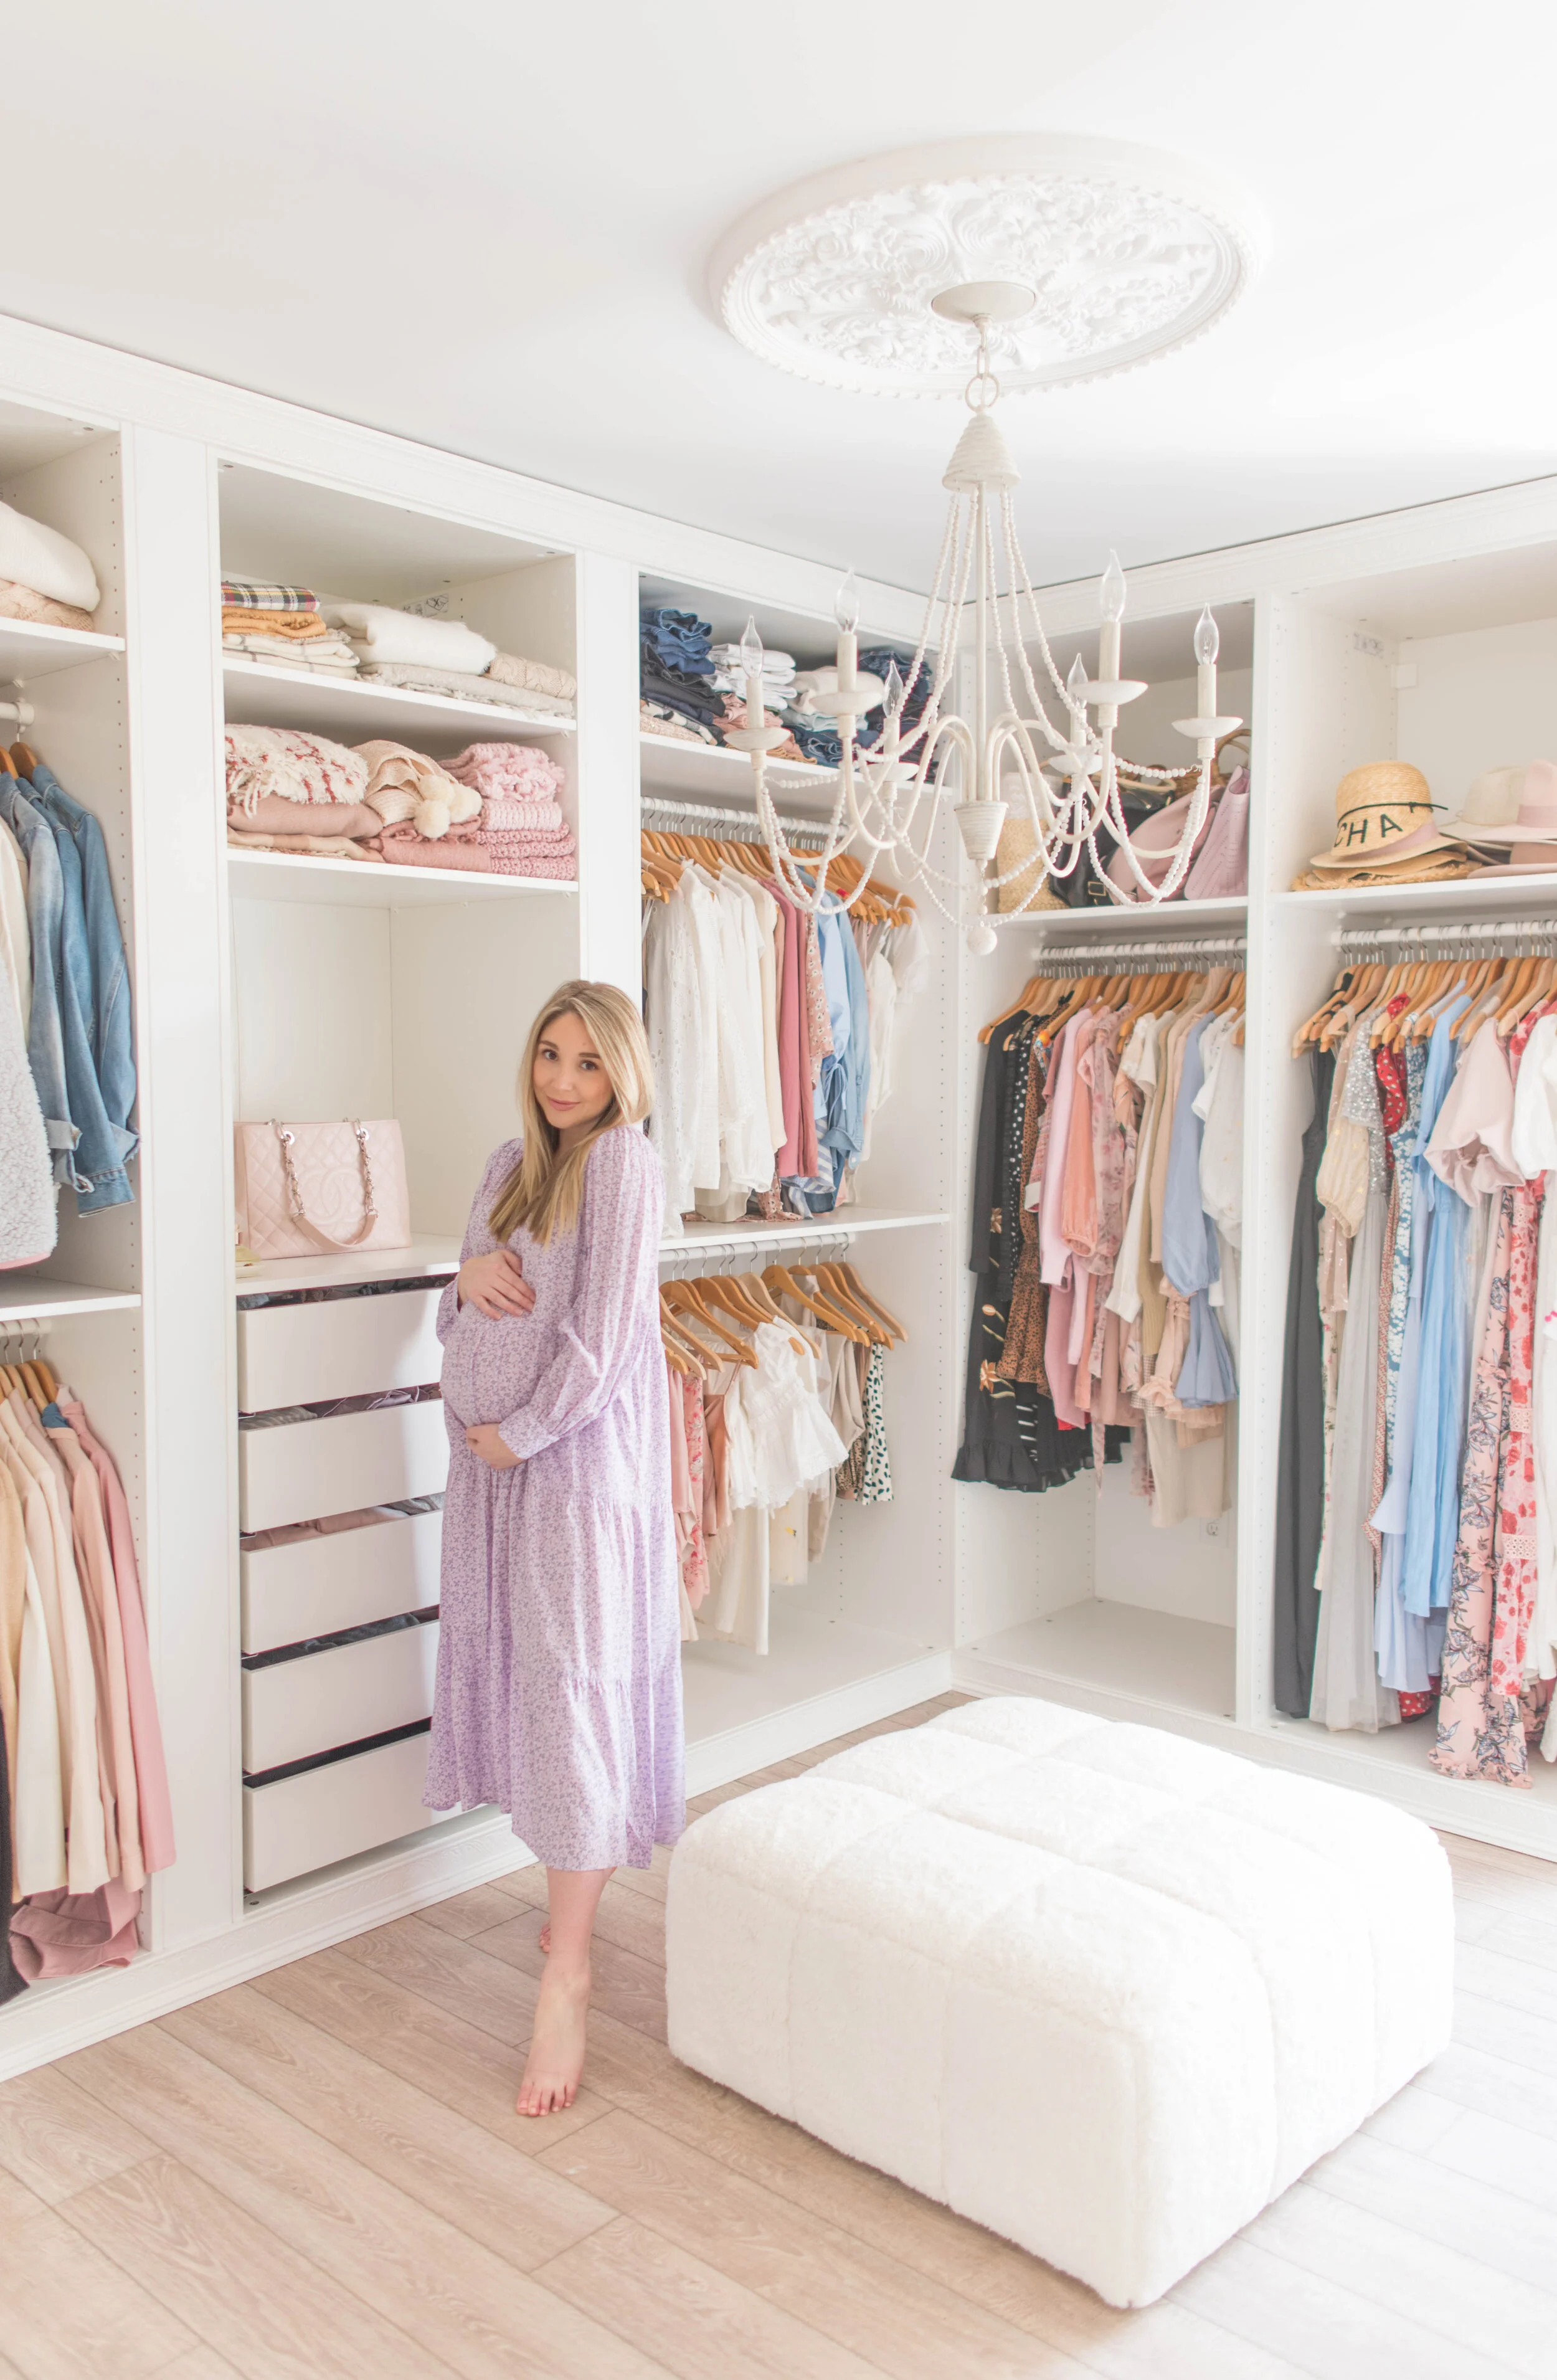
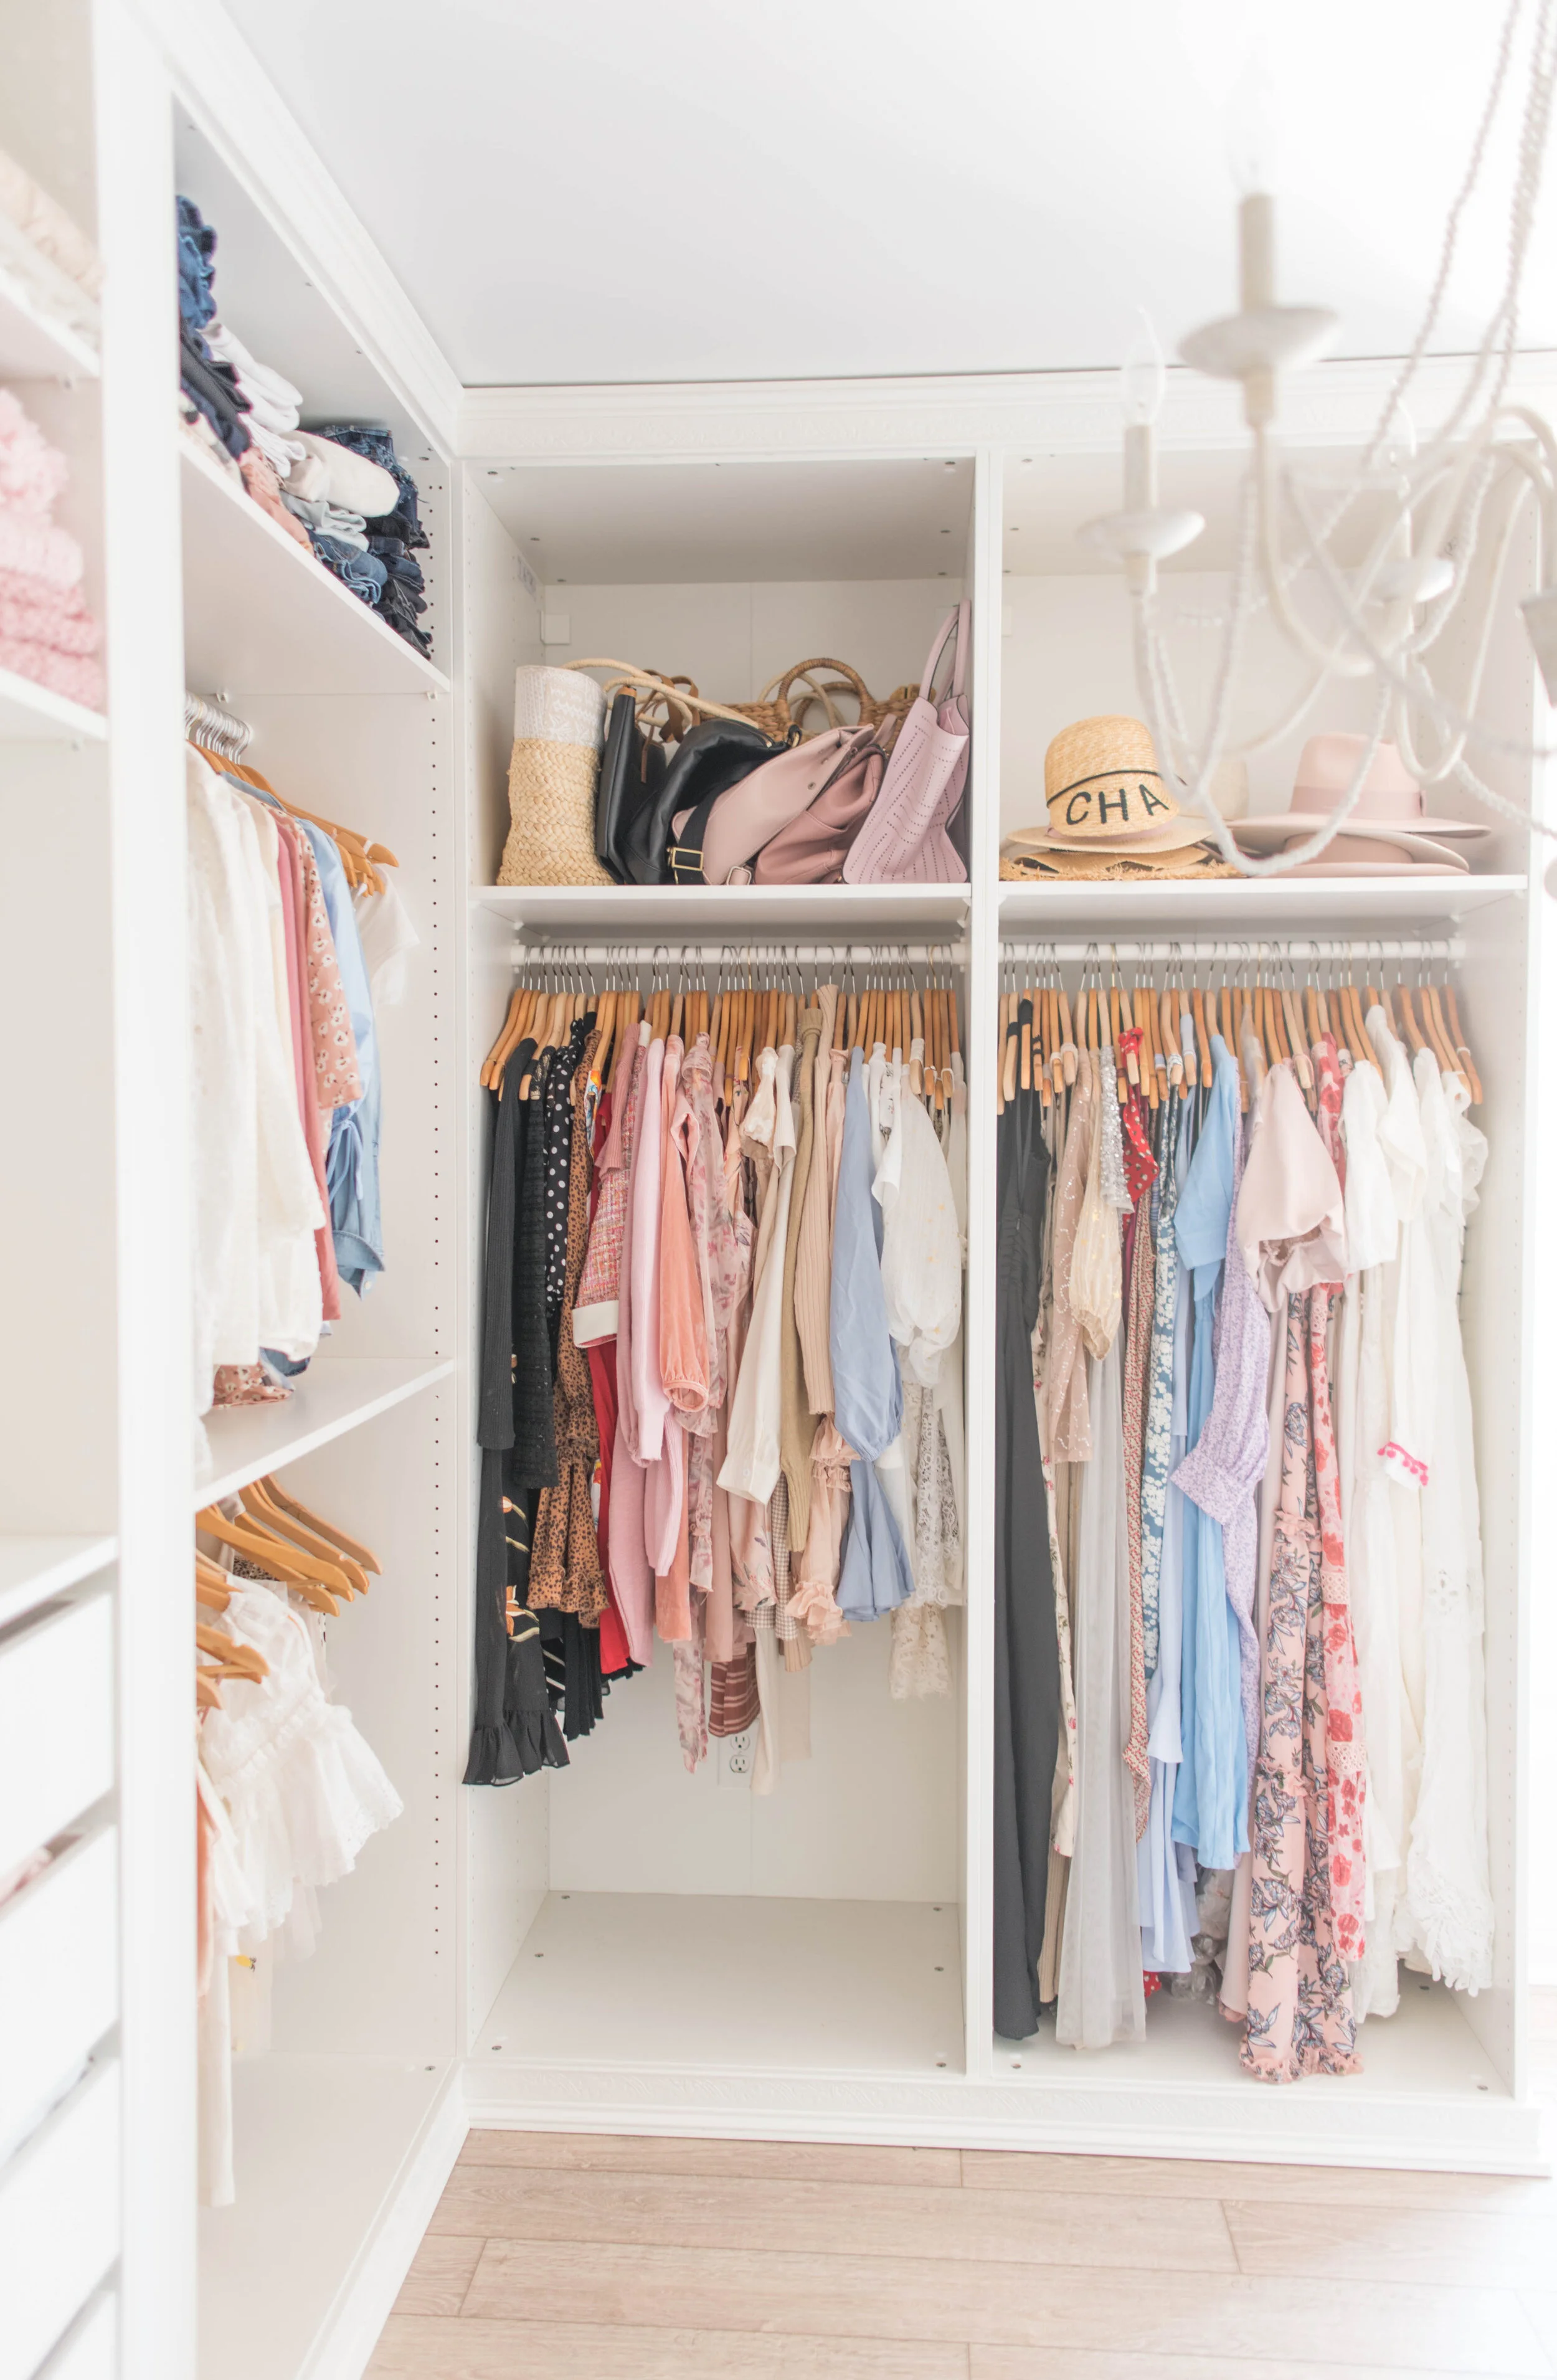
Undoubtedly, the room that I was MOST excited to design and decorate when we bought our house was my walk-in closet. We bought this house knowing that the standard closet space was fairly limited, and knew that we would only need 3 bedrooms total to raise our family in. Needless to say, when I saw that there was a 4th bedroom, Sam and I both knew that it would be the perfect place for my ever-expanding wardrobe.
Thankfully, I married a true handyman who doesn’t mind a challenge, so when I showed him inspiration photos of what I wanted to transform this room into, he was all in. Compared to custom walk-in closets that cost upwards of $10k, creating my own closet room using the IKEA Pax Storage Planner and a few extra hacks was a huge “win” financially.
Today, I’m kicking off our home makeover series with my walk-in closet, and spilling all the tea on how we designed and built it with IKEA’s Pax Storage Planner, plus the affordable hacks we added at the end to make the closet feel more custom and high-end.
IKEA Process
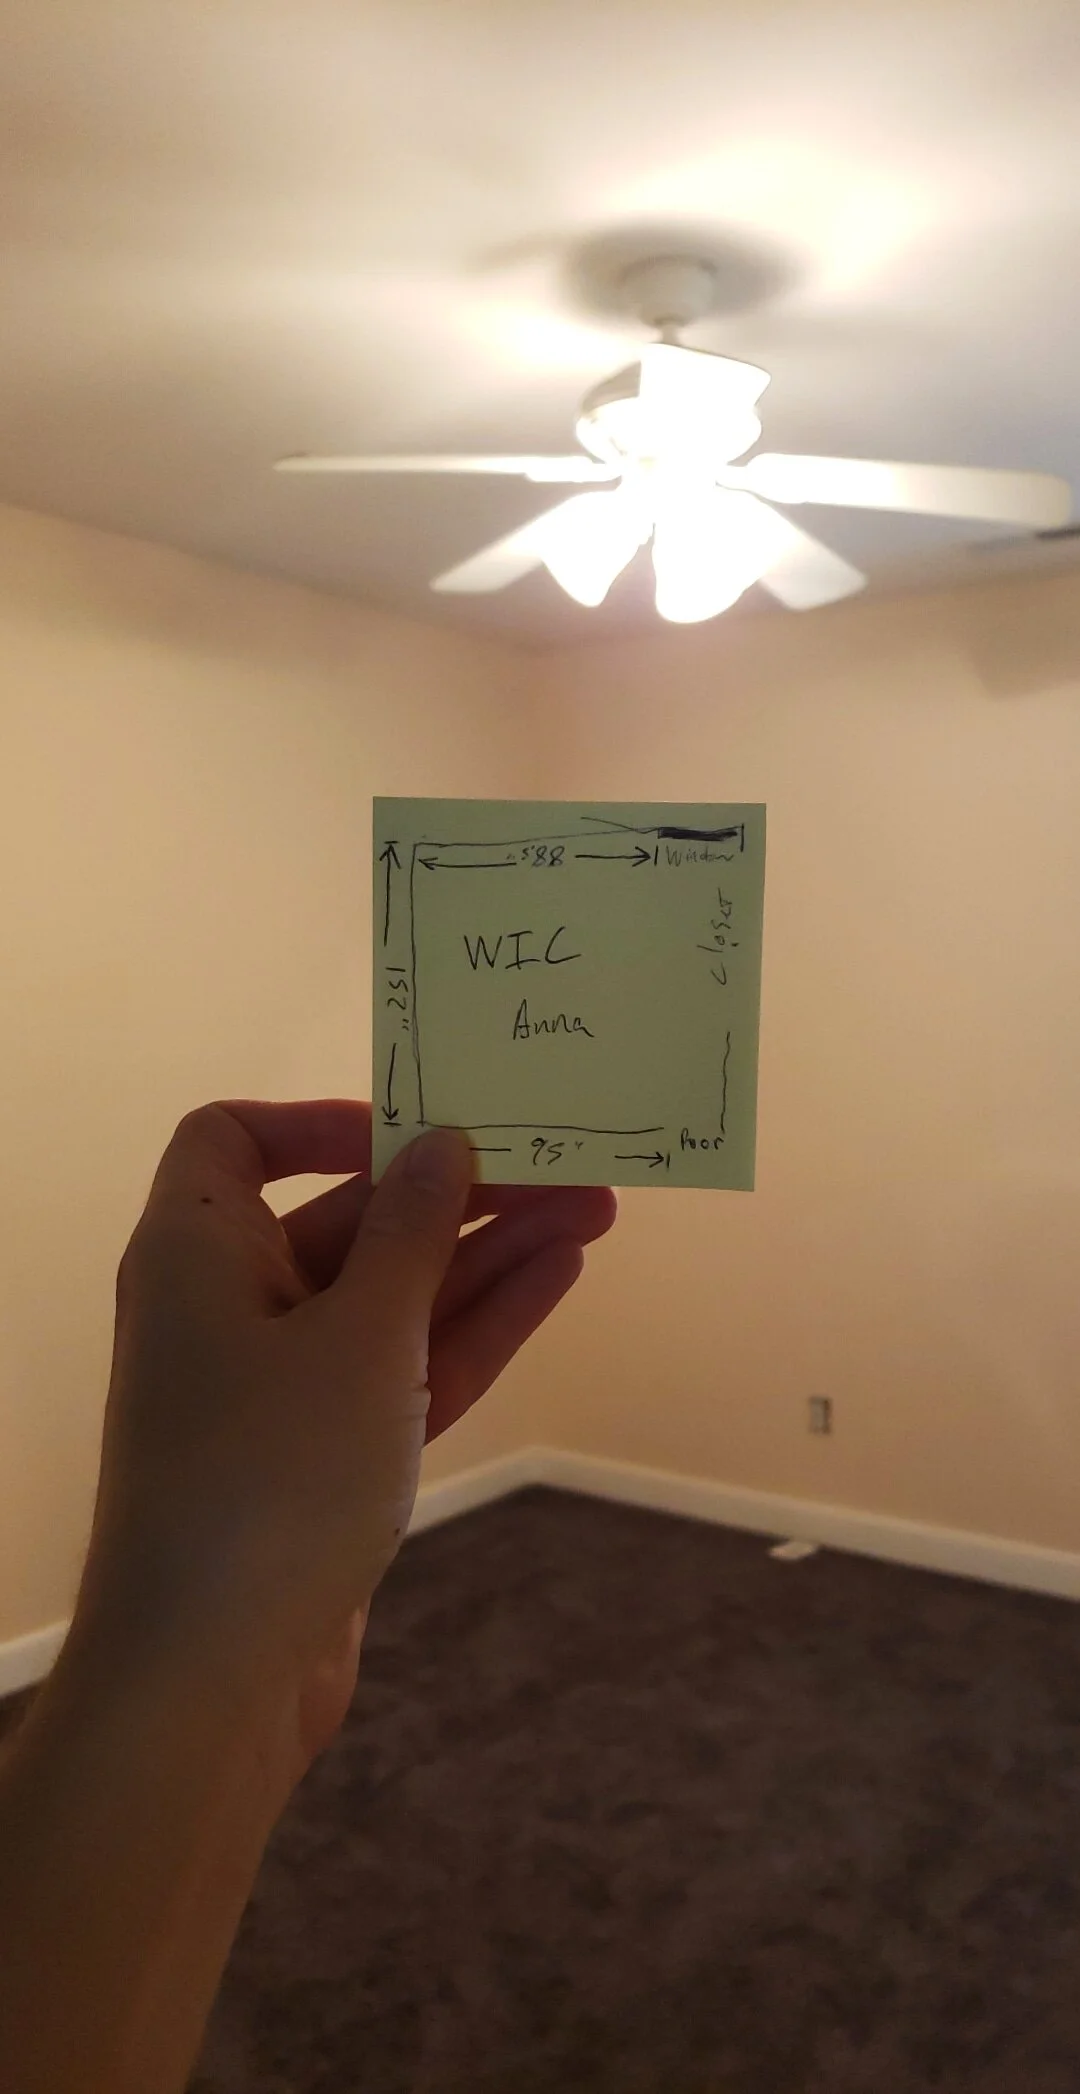
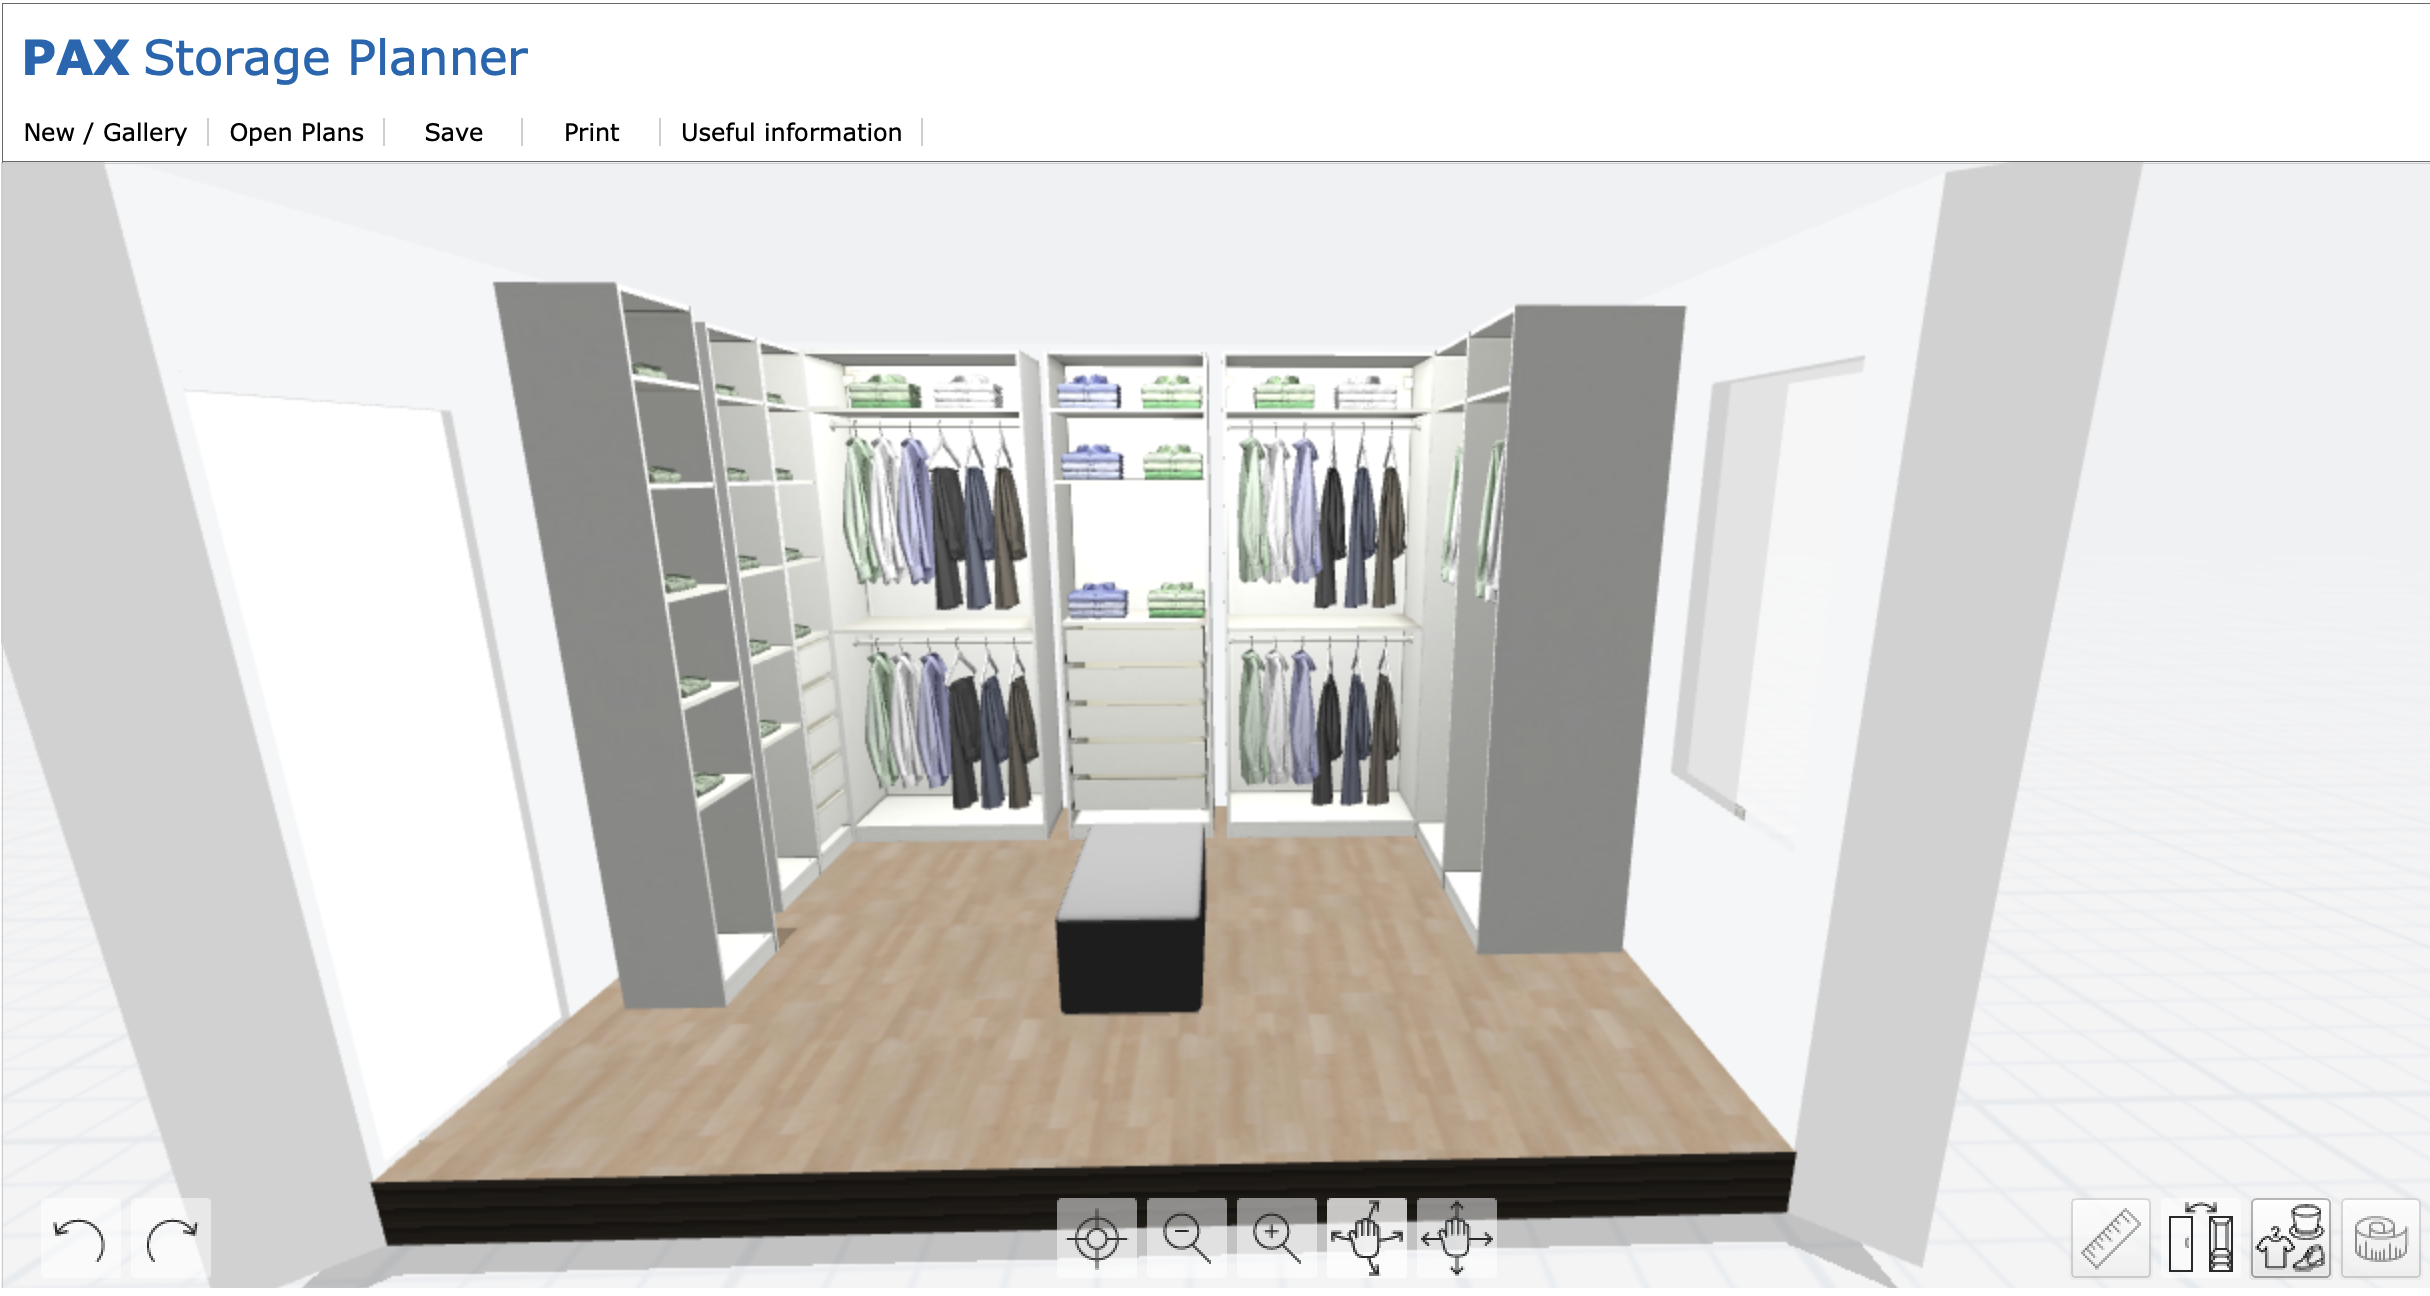
I won’t sugarcoat the online IKEA Pax Storage Planning process - to put it simply, I struggled. It took me several weeks of playing around with the dimensions and adding, removing, and rearranging the units until I finally felt like it mirrored the vision I was going for.
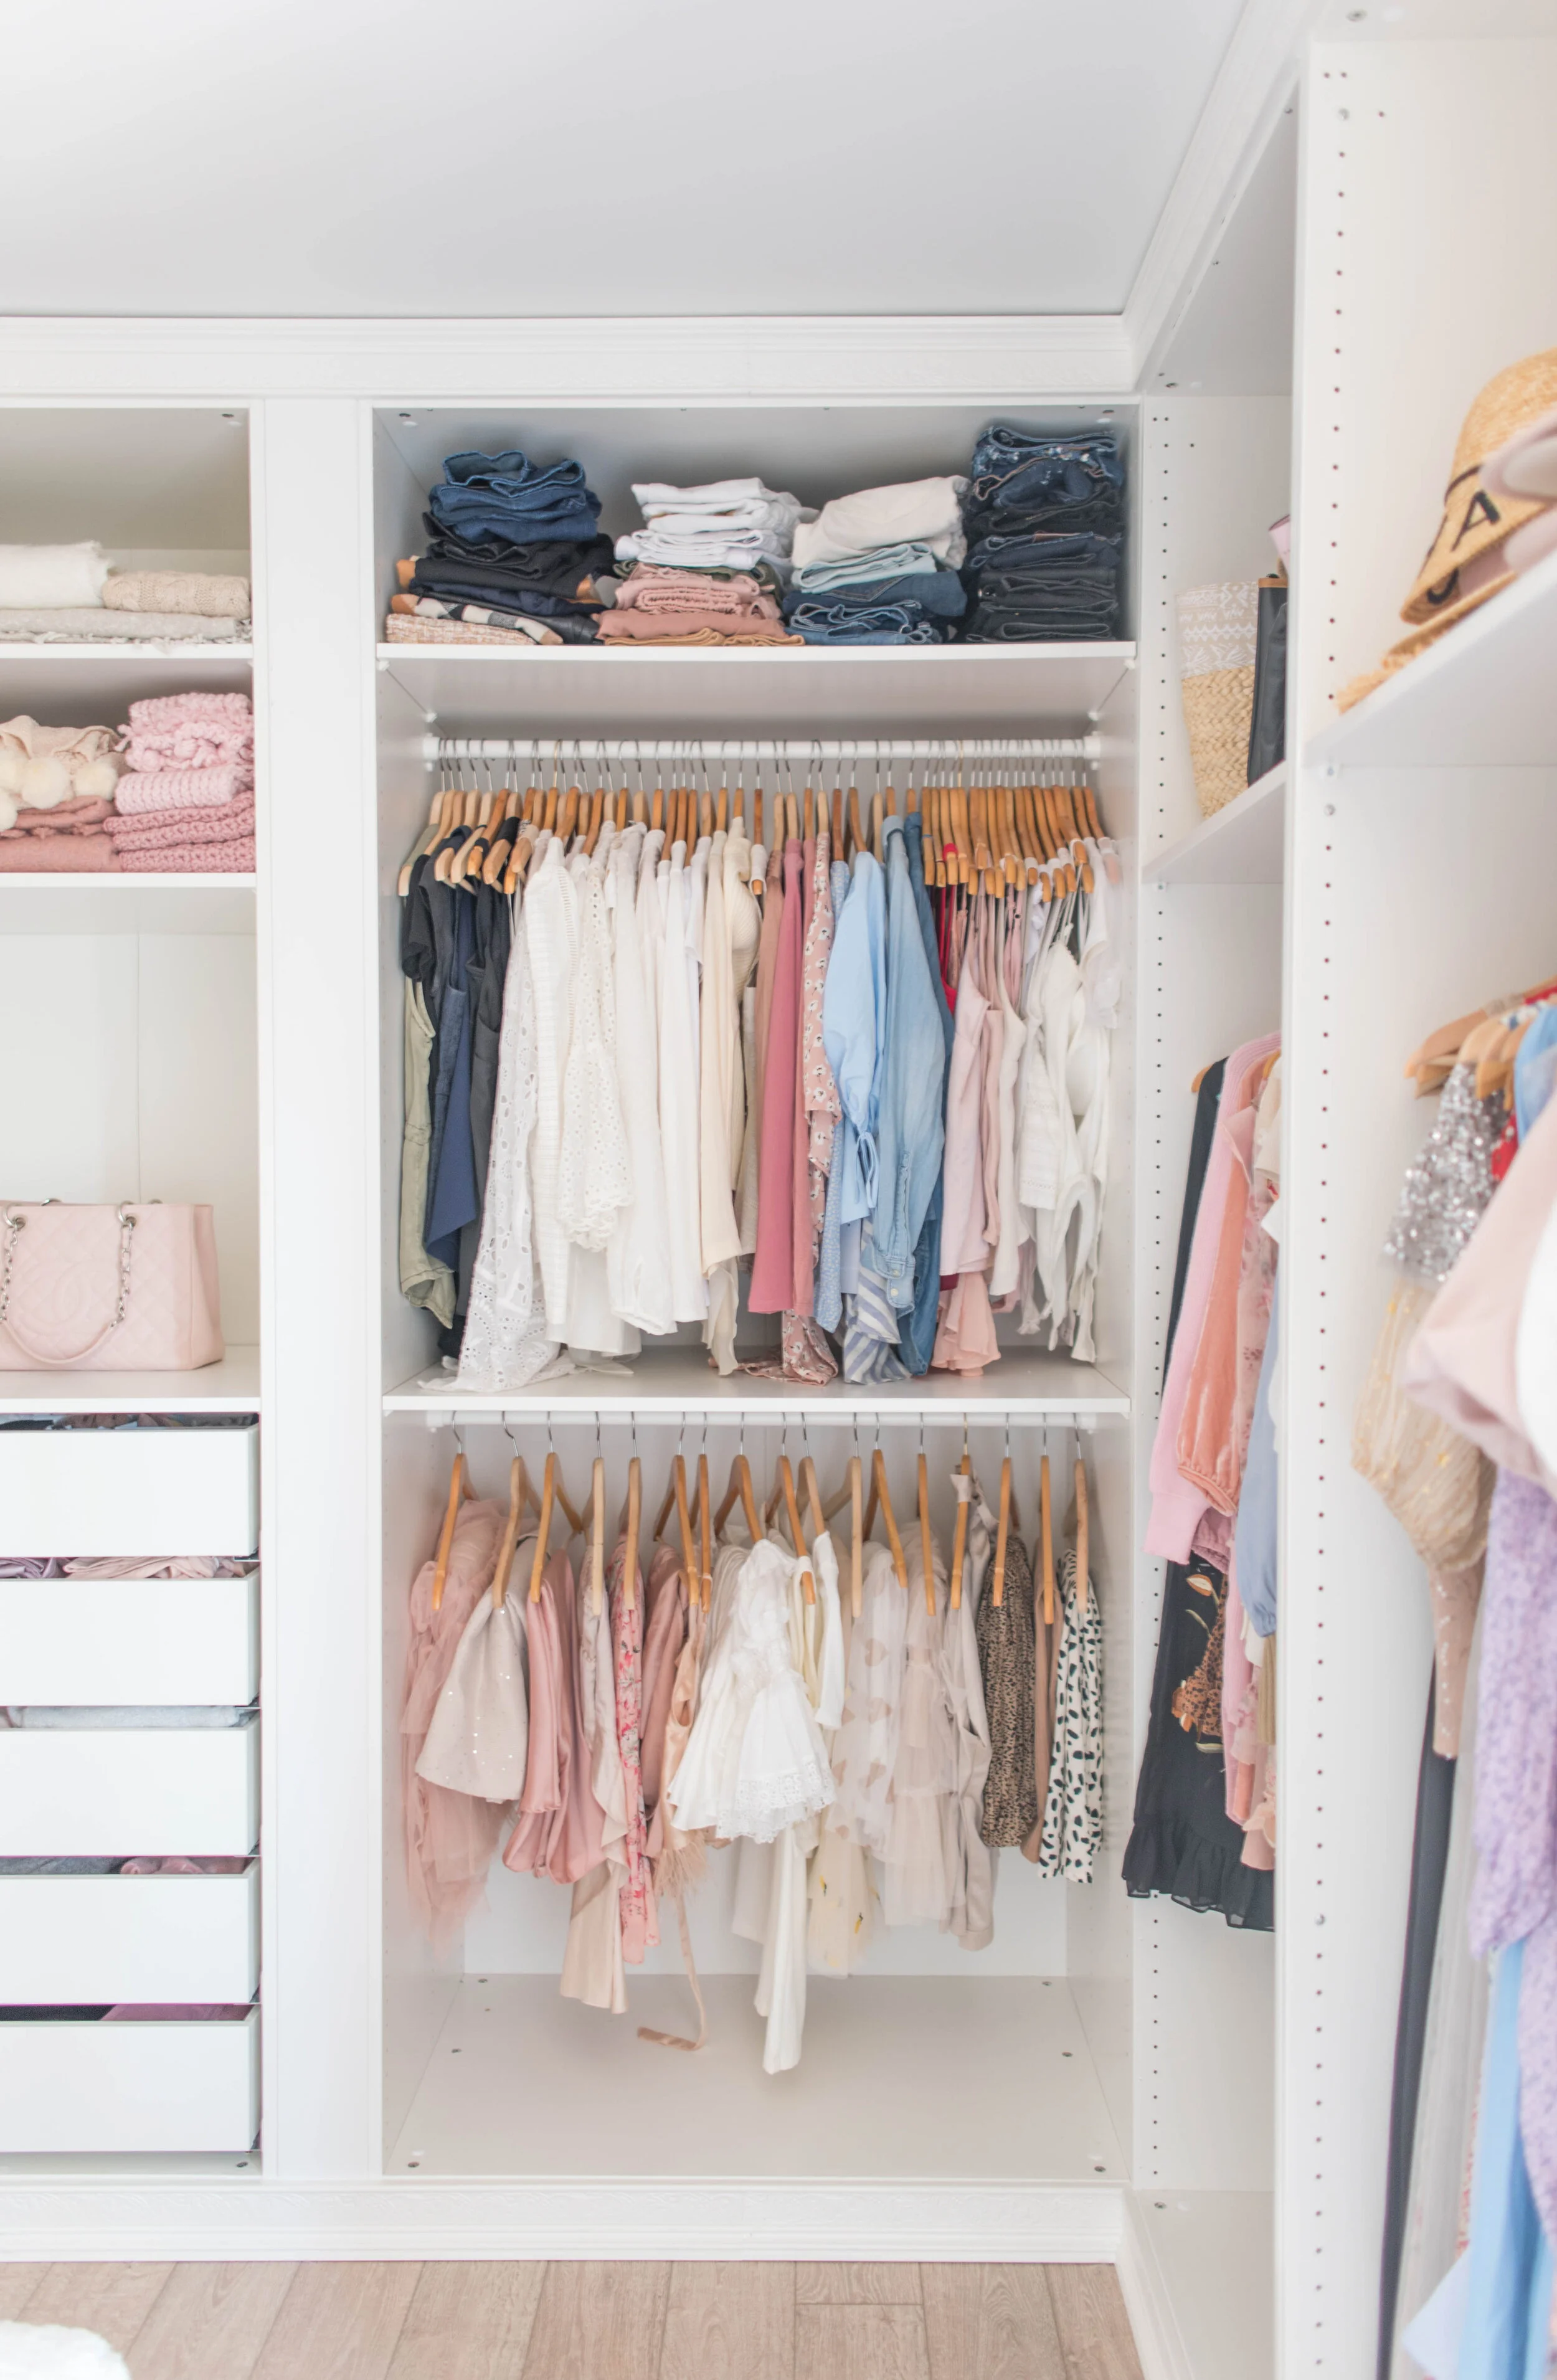
With that being said, I liked the way that you are able to customize the entire closet down to the smallest details like the drawer pulls and where the closet rods lie (plus, with the built-in holes you can switch this up in person). You are even able to add solid or glass doors onto the units if you want more of a traditional wardrobe feel.
The main issue that I had with this process was when I went to place my order for the wardrobe after weeks of working on it, their online system told me that I could not because everything was sold out. *Cue the tears*
Thankfully, even though their website was telling us that the IKEA in our area only had some of the items we needed, Sam and I decided to venture out in person anyway to see what we could do. We printed out our online plans and itemized shopping list and were able to pick up 75% of the items needed that day while the customer service clerk was able to order the remaining 25% online for us to pick up a week later. Although this wasn’t particularly convenient, it saved us money on shipping and meant that we didn’t have to wait several weeks or months to get the items delivered to us.
All in all, this was a lesson learned that IKEA’s online ordering system isn’t exactly “reliable” and even if it says that your product(s) are unavailable everywhere, it may be worth the fuss of going in person to your closest store to check anyway.
In regards to installing the IKEA units, Sam, my step Dad, and my future brother-in-law worked on the closet for one full day to put together all of the frames, shelves, and drawers. They said that it was not particularly difficult; it was simply time-consuming because there are so many pieces. Once they got the hang of the first set though, they said the rest was a breeze.
Cost of IKEA Pax Wardrobe = $1,310.00
Ikea Shopping List:
(2) PAX Wardrobe Frame, white, 39 3/8x22 7/8x92 7/8"
(5) KOMPLEMENT Drawer, white, 19 5/8x13 3/4"
(3) PAX Wardrobe Frame, white, 19 5/8x13 3/4x92 7/8"
(14) KOMPLEMENT Shelf, white, 19 5/8x13 3/4"
(5) KOMPLEMENT Shelf, white, 29 1/2x22 7/8"
(3) PAX Wardrobe frame, white, 29 1/2x22 7/8x92 7/8"
(4) KOMPLEMENT Shelf, white, 39 3/8x22 7/8"
(4) KOMPLEMENT Clothes rail, white, 39 3/8"
(5) KOMPLEMENT Drawer, white, 29 1/2x22 7/8"
(1) KOMPLEMENT Clothes rail, white, 19 5/8"
(2) KOMPLEMENT Clothes rail, white, 29 1/2"

Removed trim around baseboard to lay storage units flush to walls
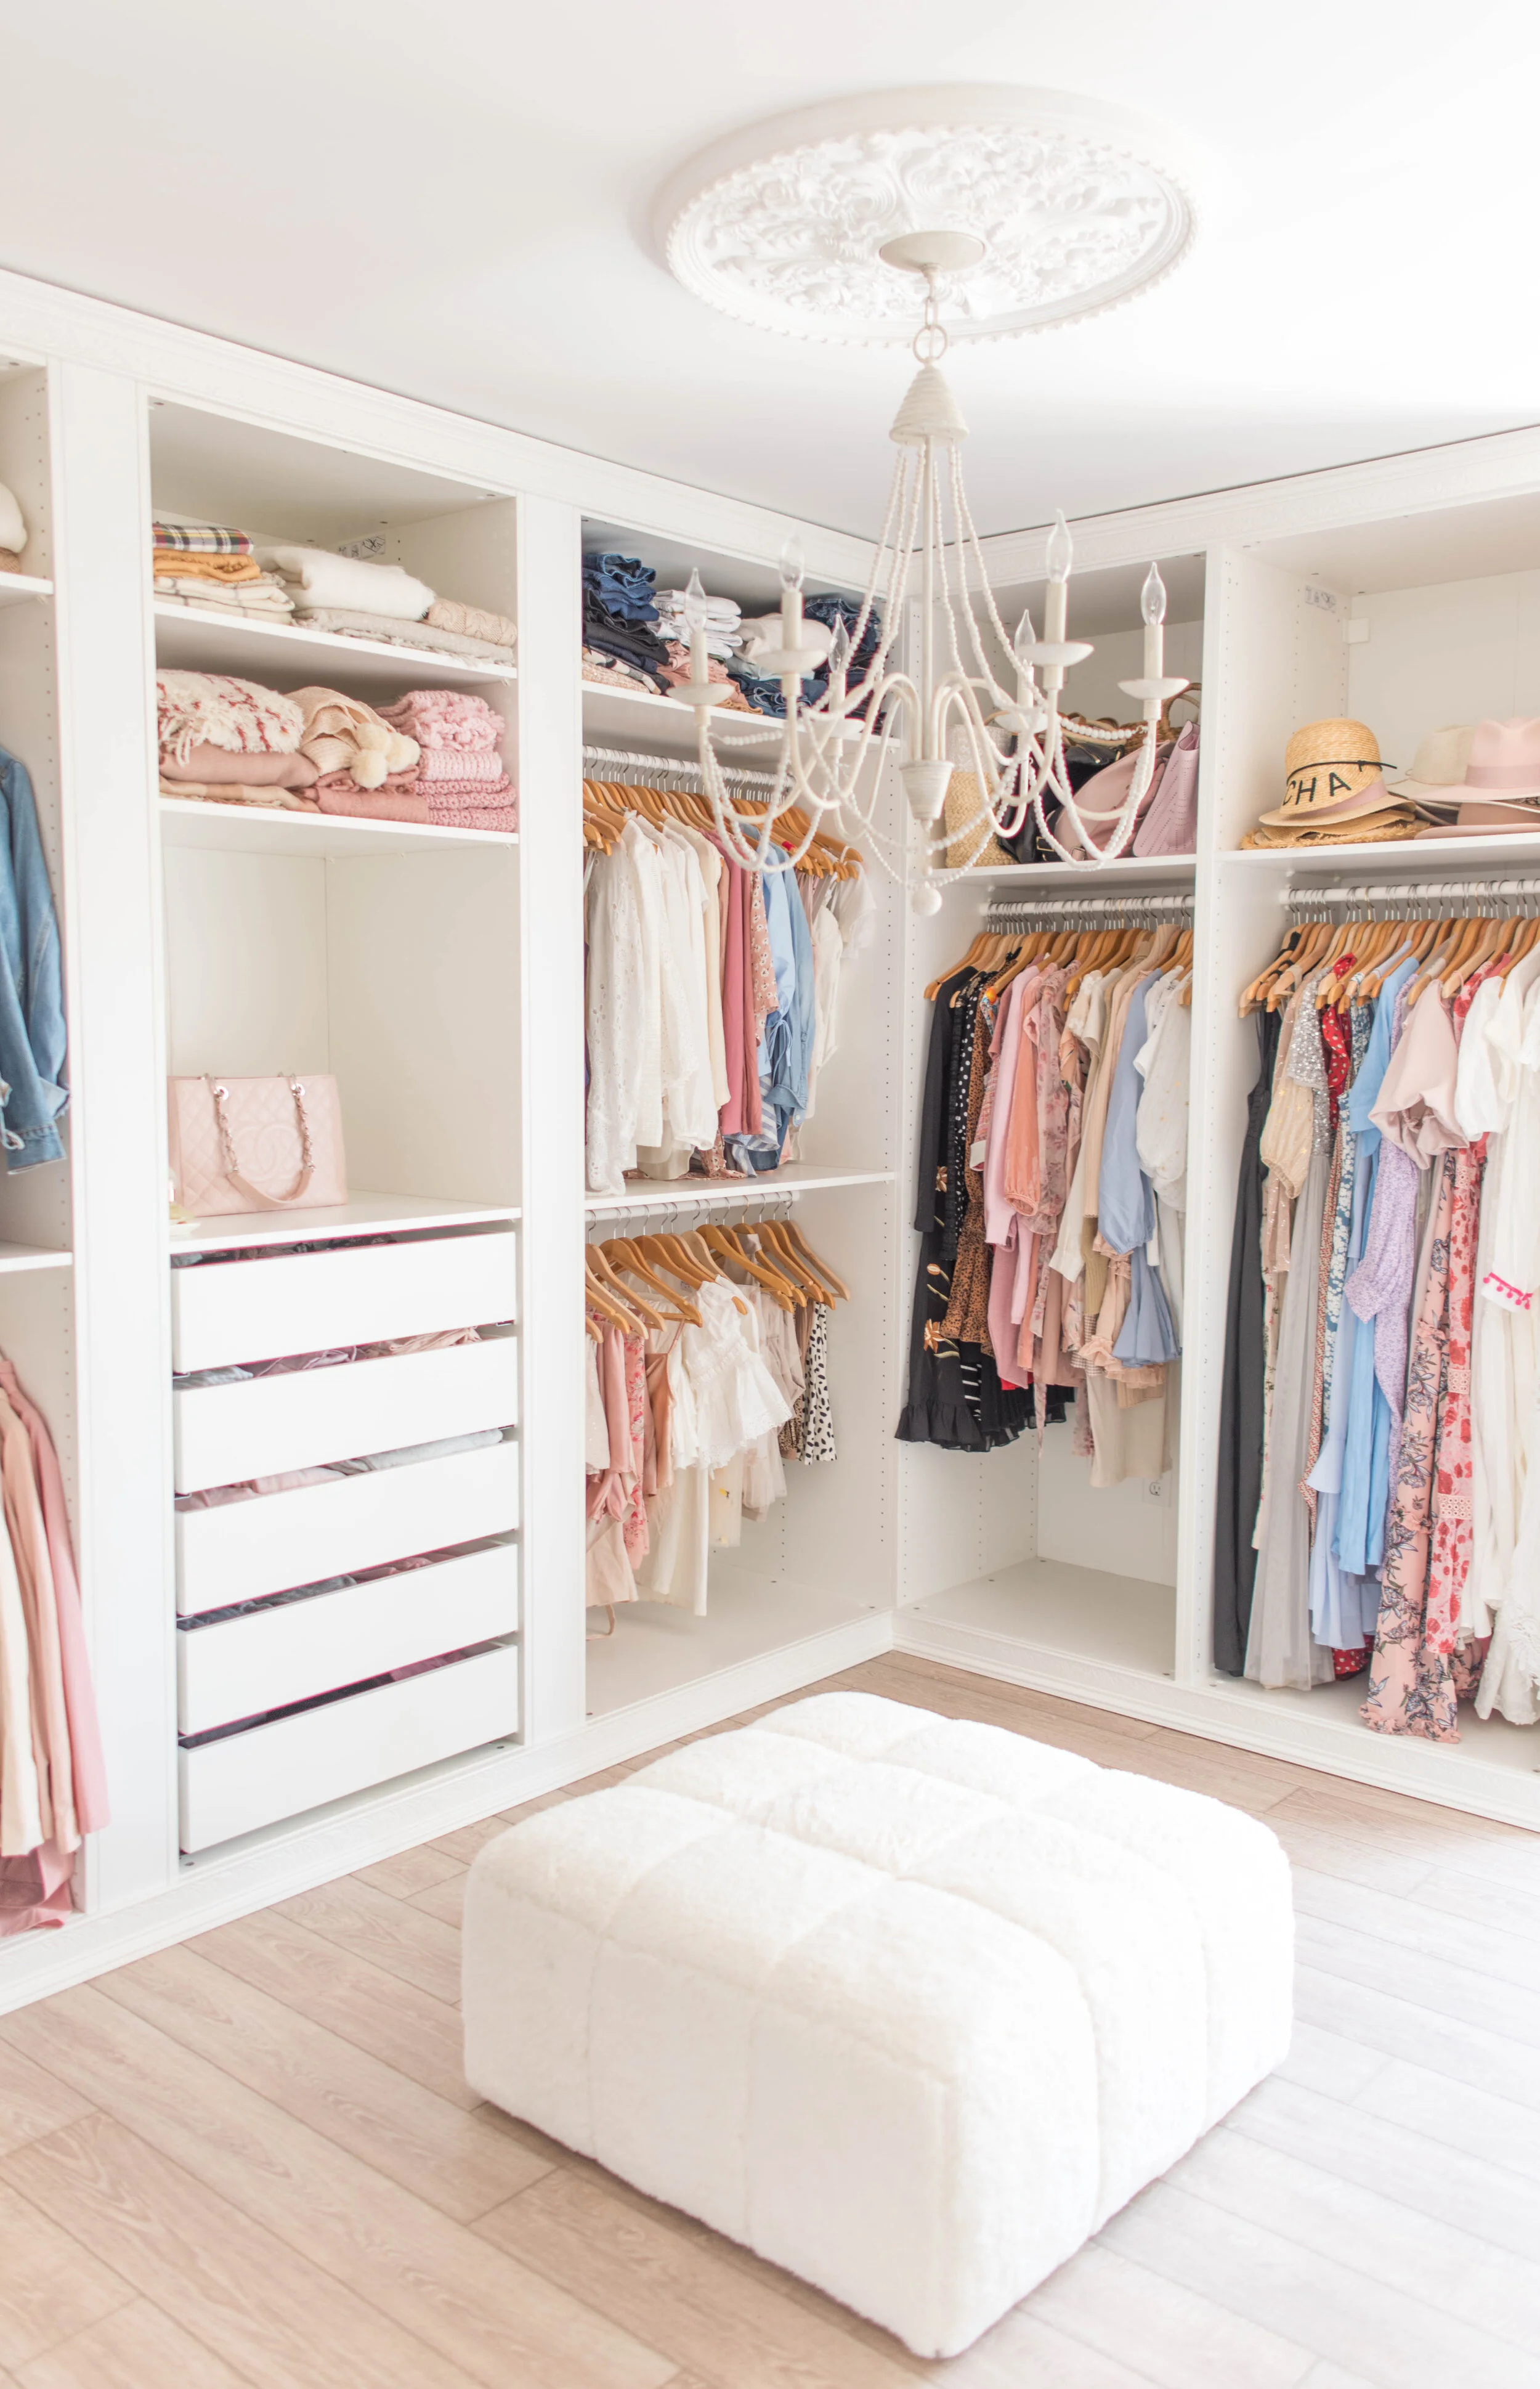
In order for the IKEA storage units to lay flush against the walls (making them look like built-ins and preventing a potential falling hazard), Sam removed the pieces of trim around the baseboard and cut them to size before installing the wardrobe to fit perfectly inside.
Added solid white boards on each side of middle unit to connect
In my IKEA design online, it was inevitable that I would have a small space on either side of the middle unit due to the dimensions of my room and the size of the units that IKEA offers. I was a little concerned about this initially, but when I showed Sam my dilemma, he quickly suggested that we connect the units with wooden boards.
We were able to buy white-painted wooden boards that fit exactly into the two spaces we needed to close the gaps. Sam simply wedged each one in between the storage units and used a finishing nail gun to secure them in place.
Looking at the completed design now, I’m so happy that we went in this direction because I really enjoy the center unit having the extra separation making it more of a focal point.
Added crown moulding at the top and bottom
In my opinion, this is the easiest and most affordable way to add a custom feel to your IKEA Pax wardrobe. Adding crown moulding to the top and bottom of your entire storage build makes the closet look like a built-in rather than just some white wood boxes placed in the room.
Sam cut the crown moulding using a mitre saw to the length needed for each wall unit and used a finishing nail gun to install them.
In order to prevent leaning on the top, Sam cut 1 inch wooden blocks and screwed them in approximately every foot onto the top of the storage units to attach the crown moulding to so they would sit at 90 degrees.
Once done, he applied white caulk to the edges to blend the ceiling and crown moulding/storage units seamlessly.
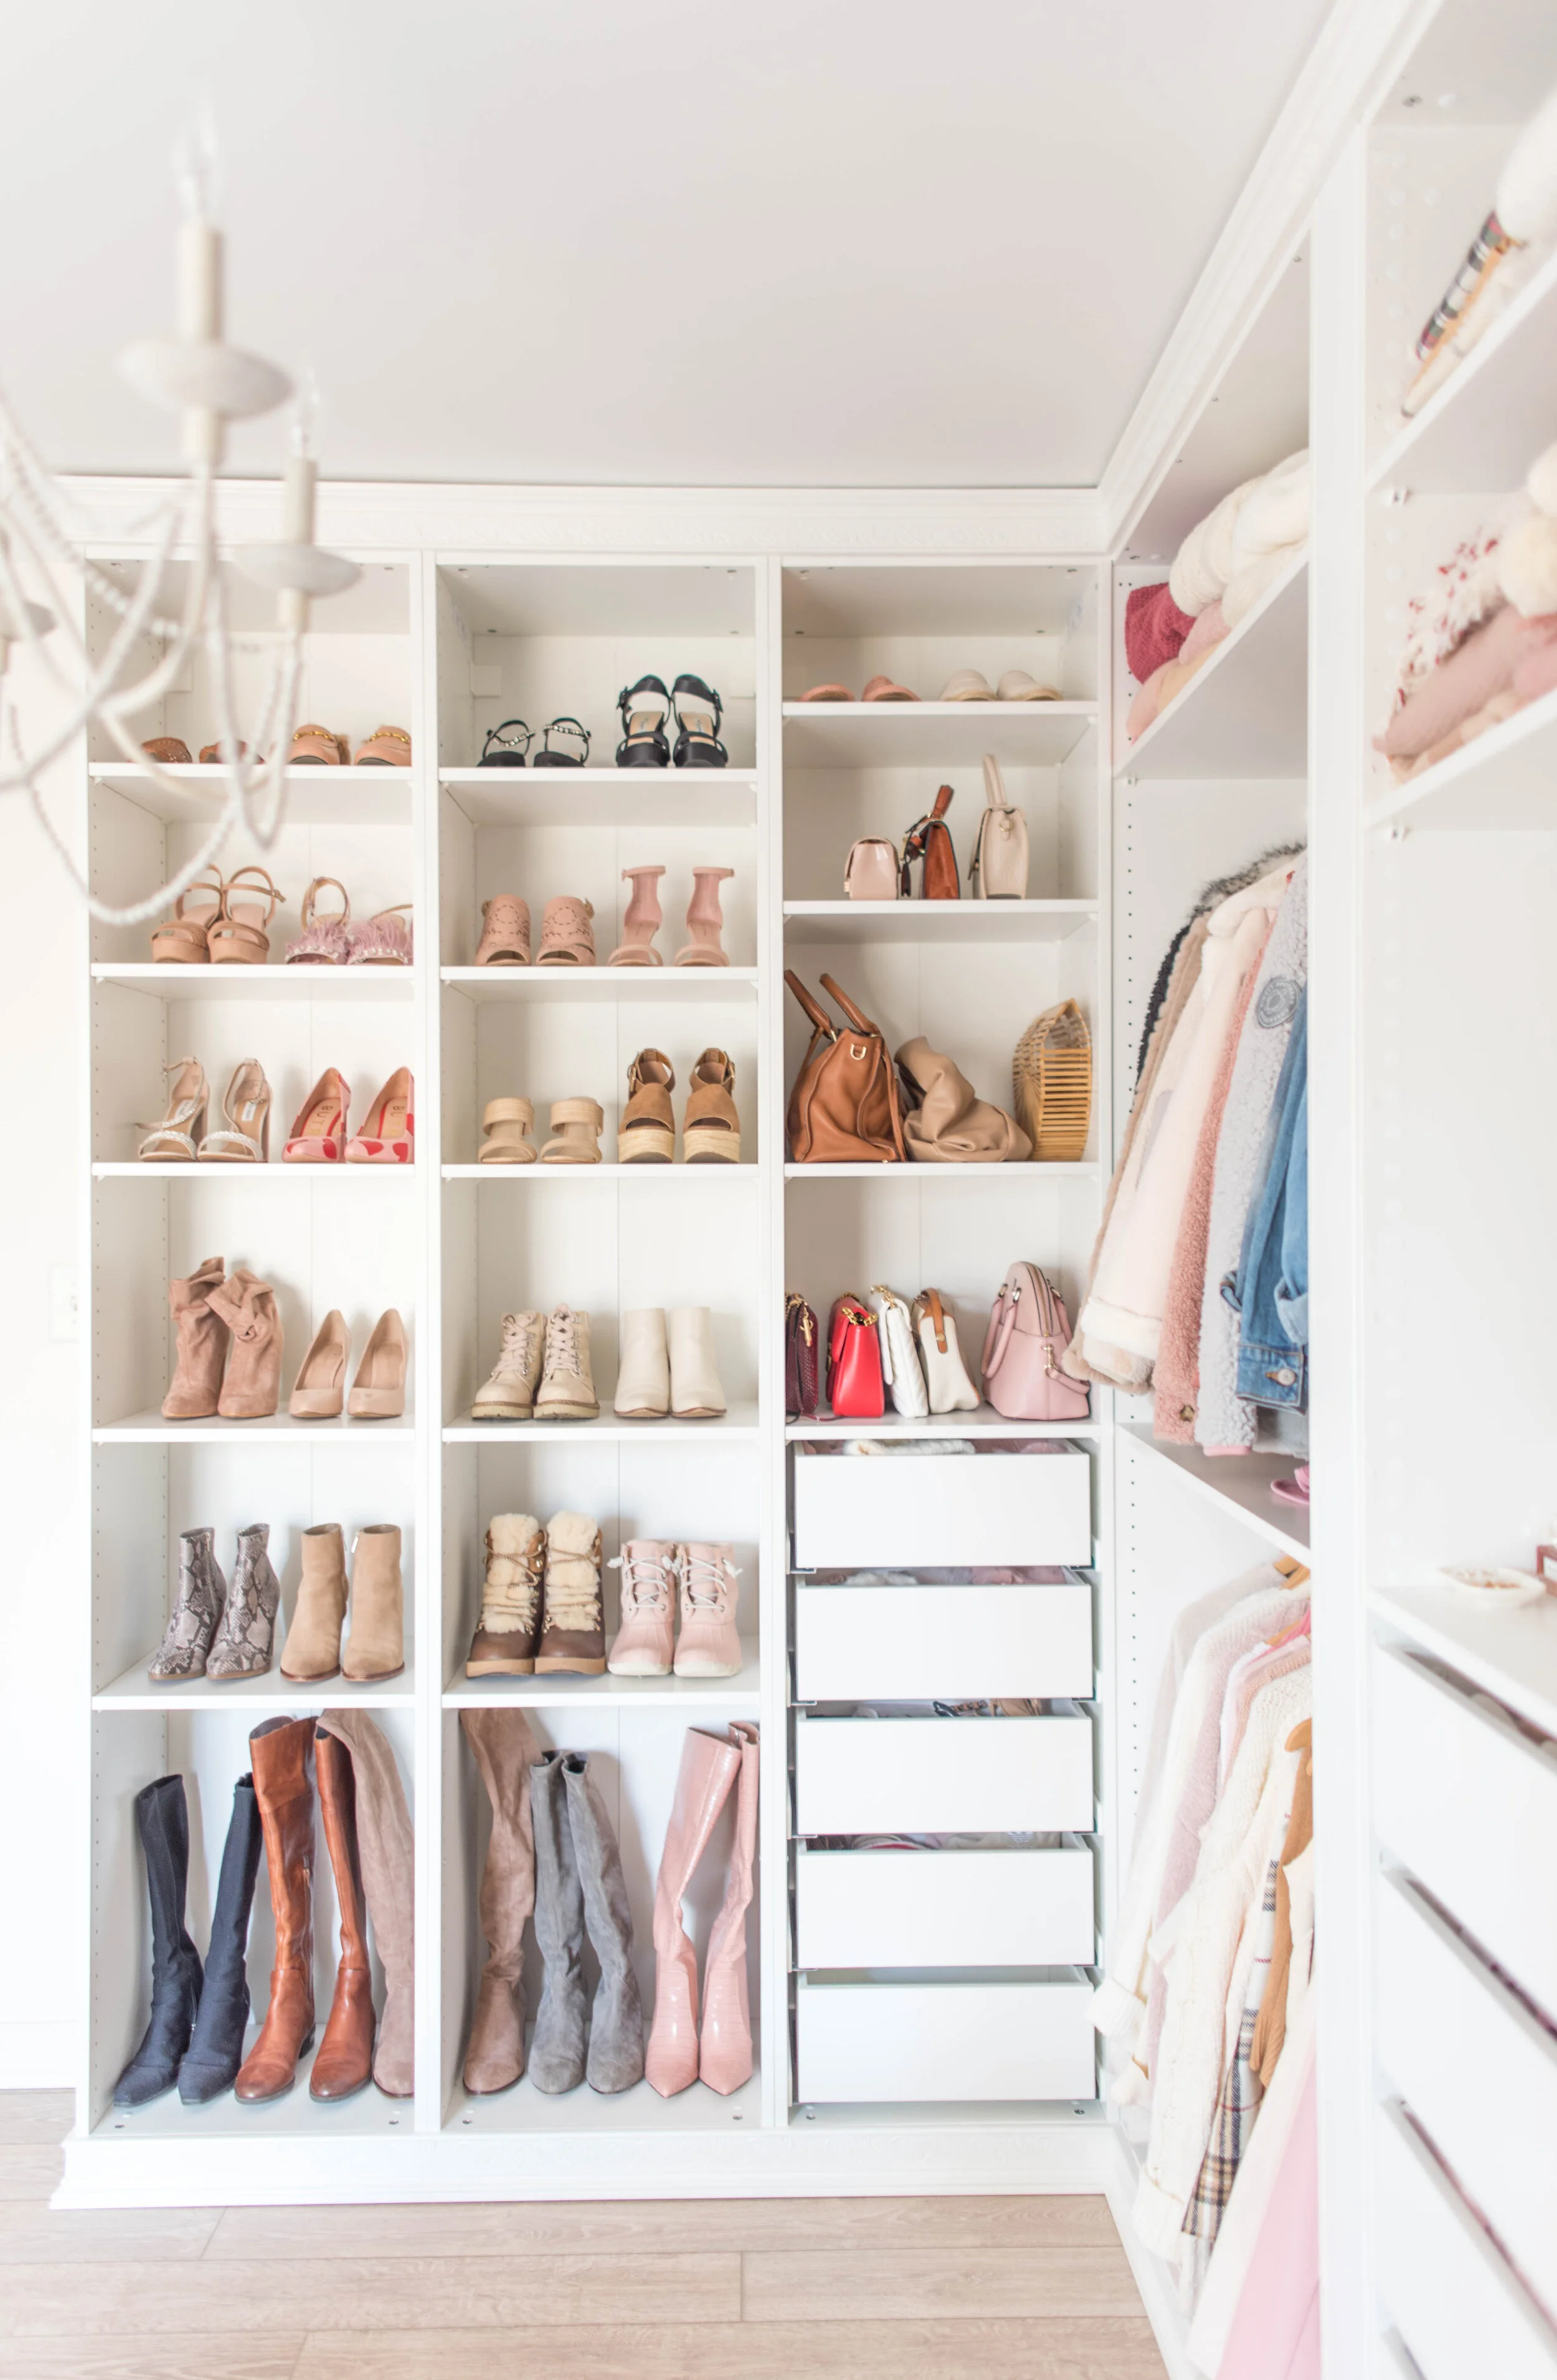
Filled the center frame and large bolt Ikea PAX storage holes
To be honest, I had a tough time with this one and this alone is why it took me several weeks longer to share my closet reveal than I had originally planned for. There aren’t a ton of great options for filling these IKEA PAX storage holes that look professional and/or don’t take a ton of additional time and money.
I tried first to fill the holes individually with white caulk, but didn’t love the end result and realized that it would have taken me hours upon hours to fill every hole to perfection. Then, I tried a white professional-grade tape which looked exactly how it sounds - like tape on your closet, aka not cute.
Finally, I found some white adhesive cover caps (aka stickers) online that another DIY-er suggested for the IKEA Pax wardrobe and used those for the center frame. However, I’m still not convinced that I’ll use them the entire way around to fill every hole as they are a little pricey (only about 50 come in each pack) and still don’t 100% fit my vision.
While purchasing these circle stickers, I also ordered a package of the white plastic hole plugs to fill the bigger bolt holes at the top of the units which worked perfectly.
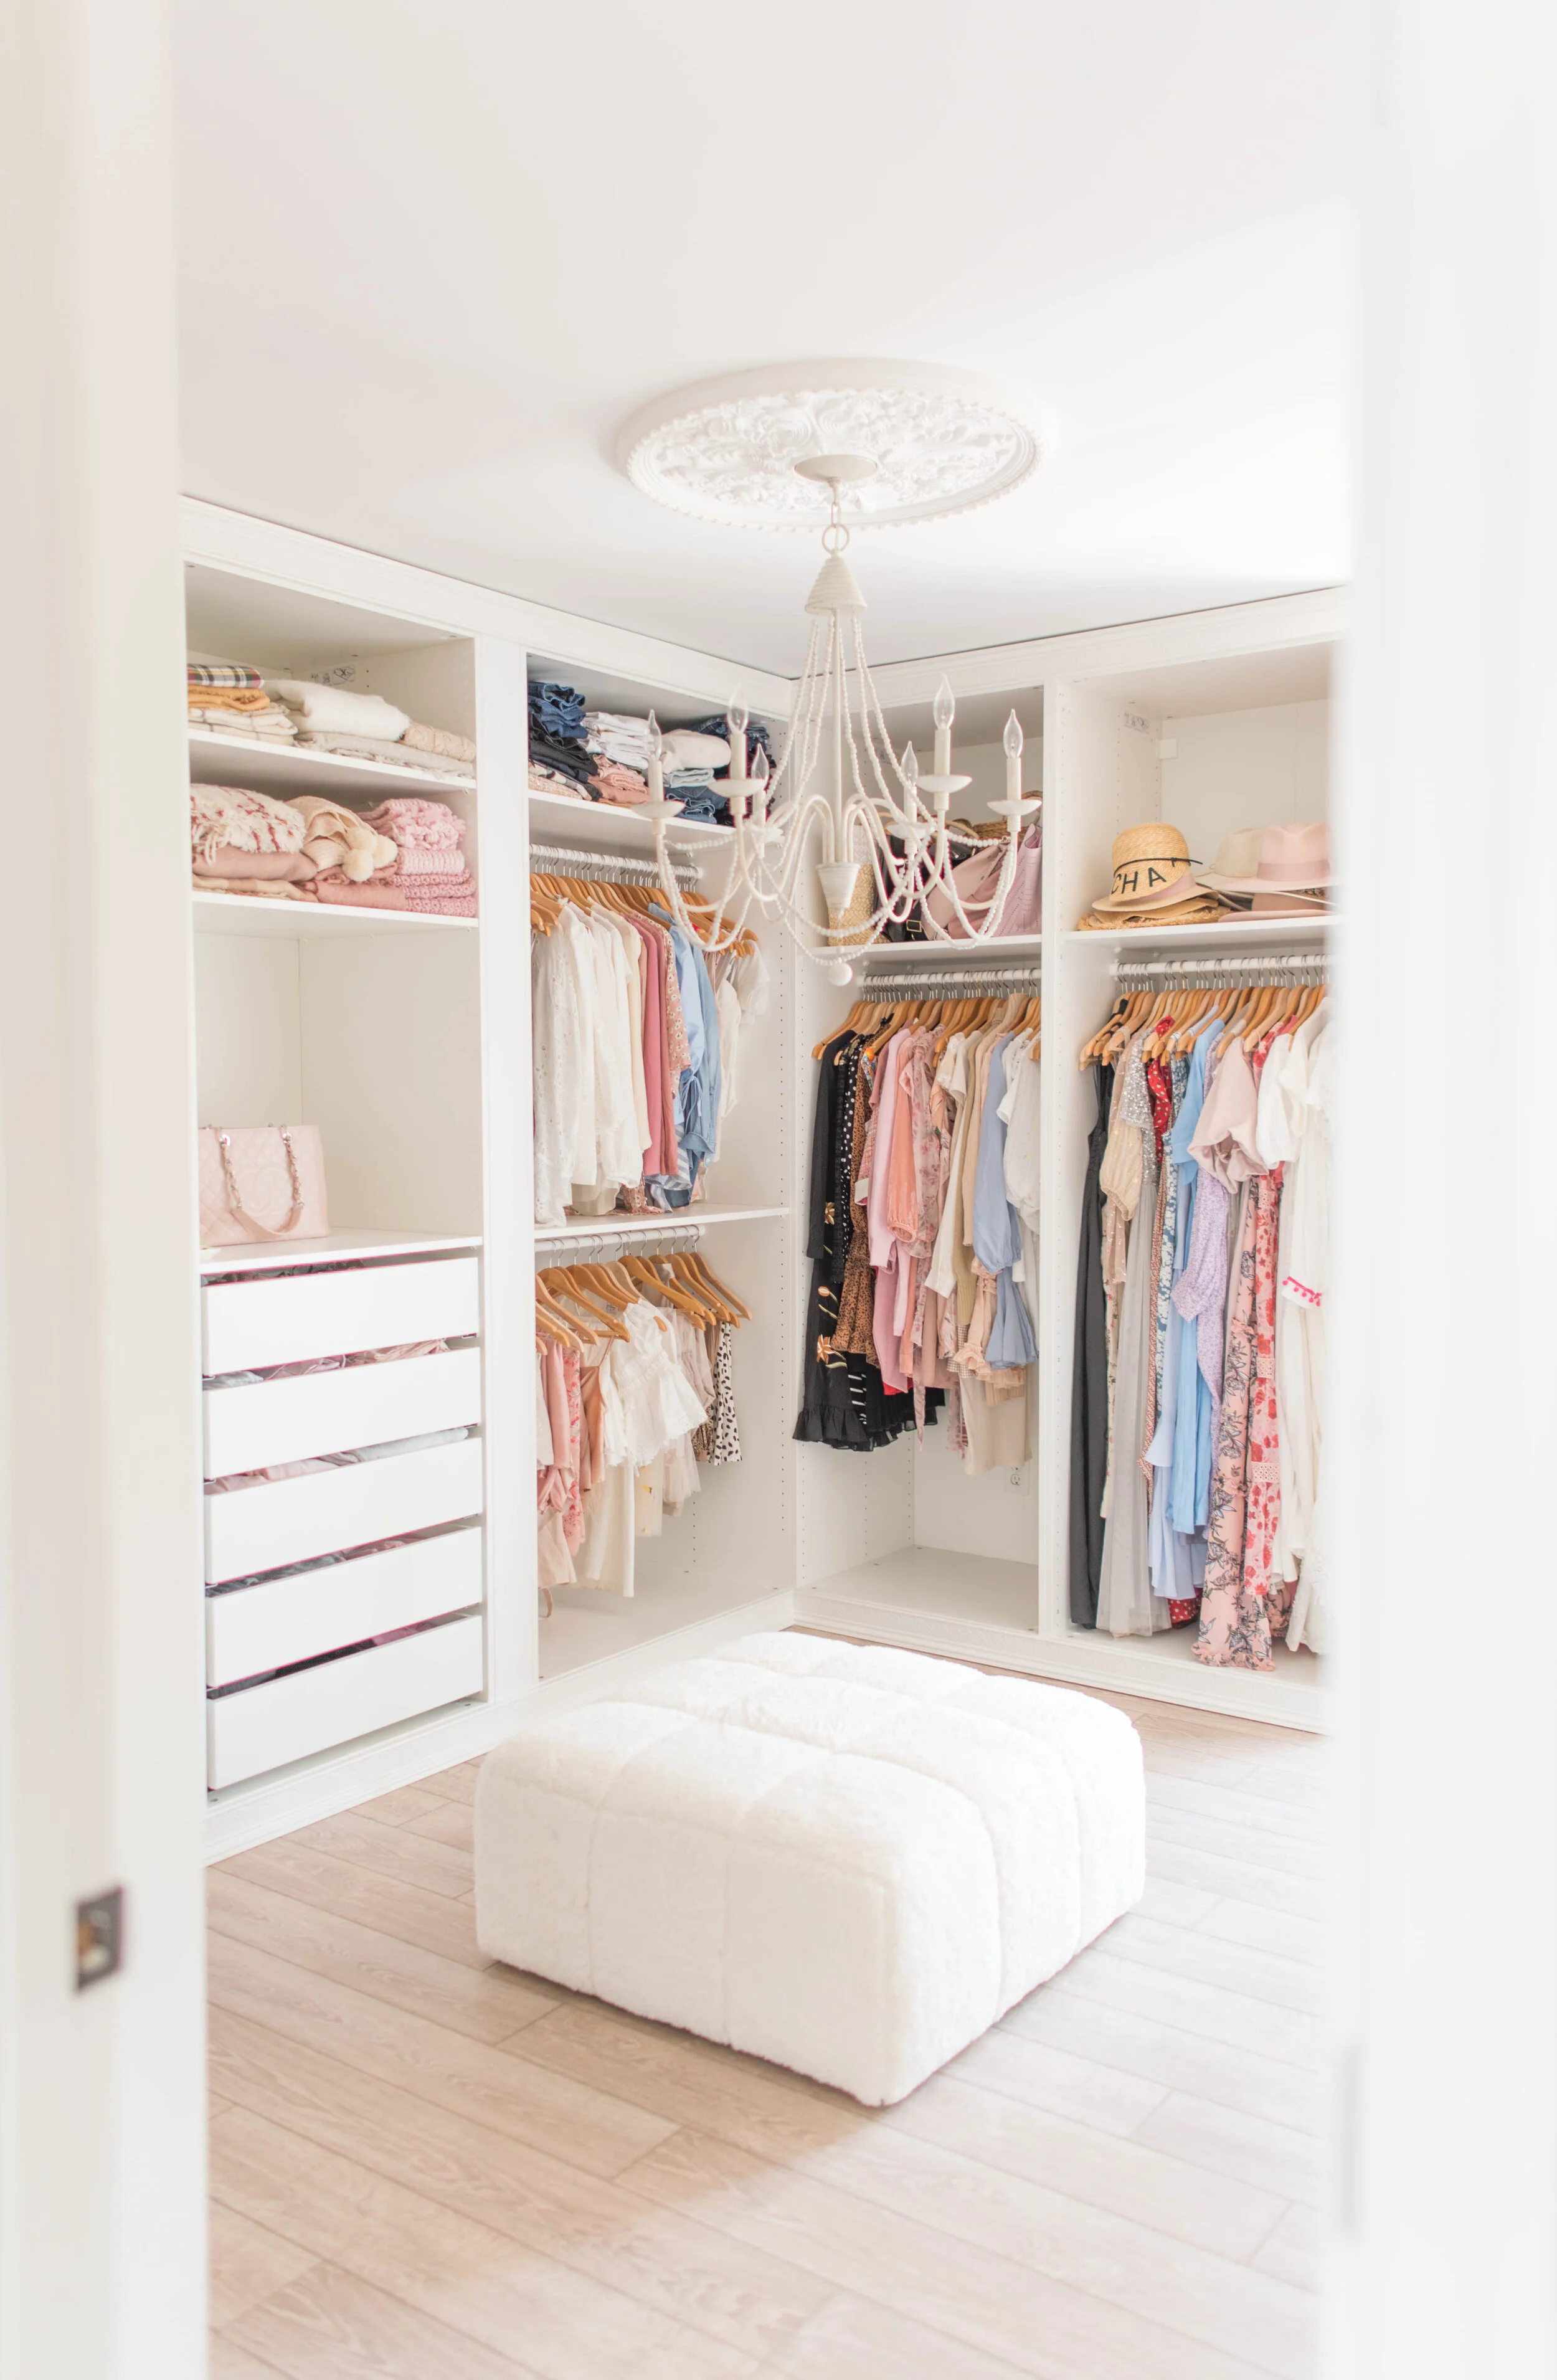
Replaced light with white medallion and chandelier
Switching out our white ceiling fan for a hand-carved medallion and vintage-inspired chandelier added that final touch of elegance that the room needed in order to look like a walk-in closet. Installing the medallion was simple (and cost less than $50); Sam used silicon on the back side of the medallion to stick onto the ceiling and a finishing nail gun to secure it into place and then added a thin layer of white caulk to blend the edges seamlessly into the ceiling.
As for the chandelier, I wanted to pair the medallion with something that fit into the French-style theme I was going for and this weathered white color and mix of wood and metal design was the perfect solution (it’s also super affordable; under $250!)
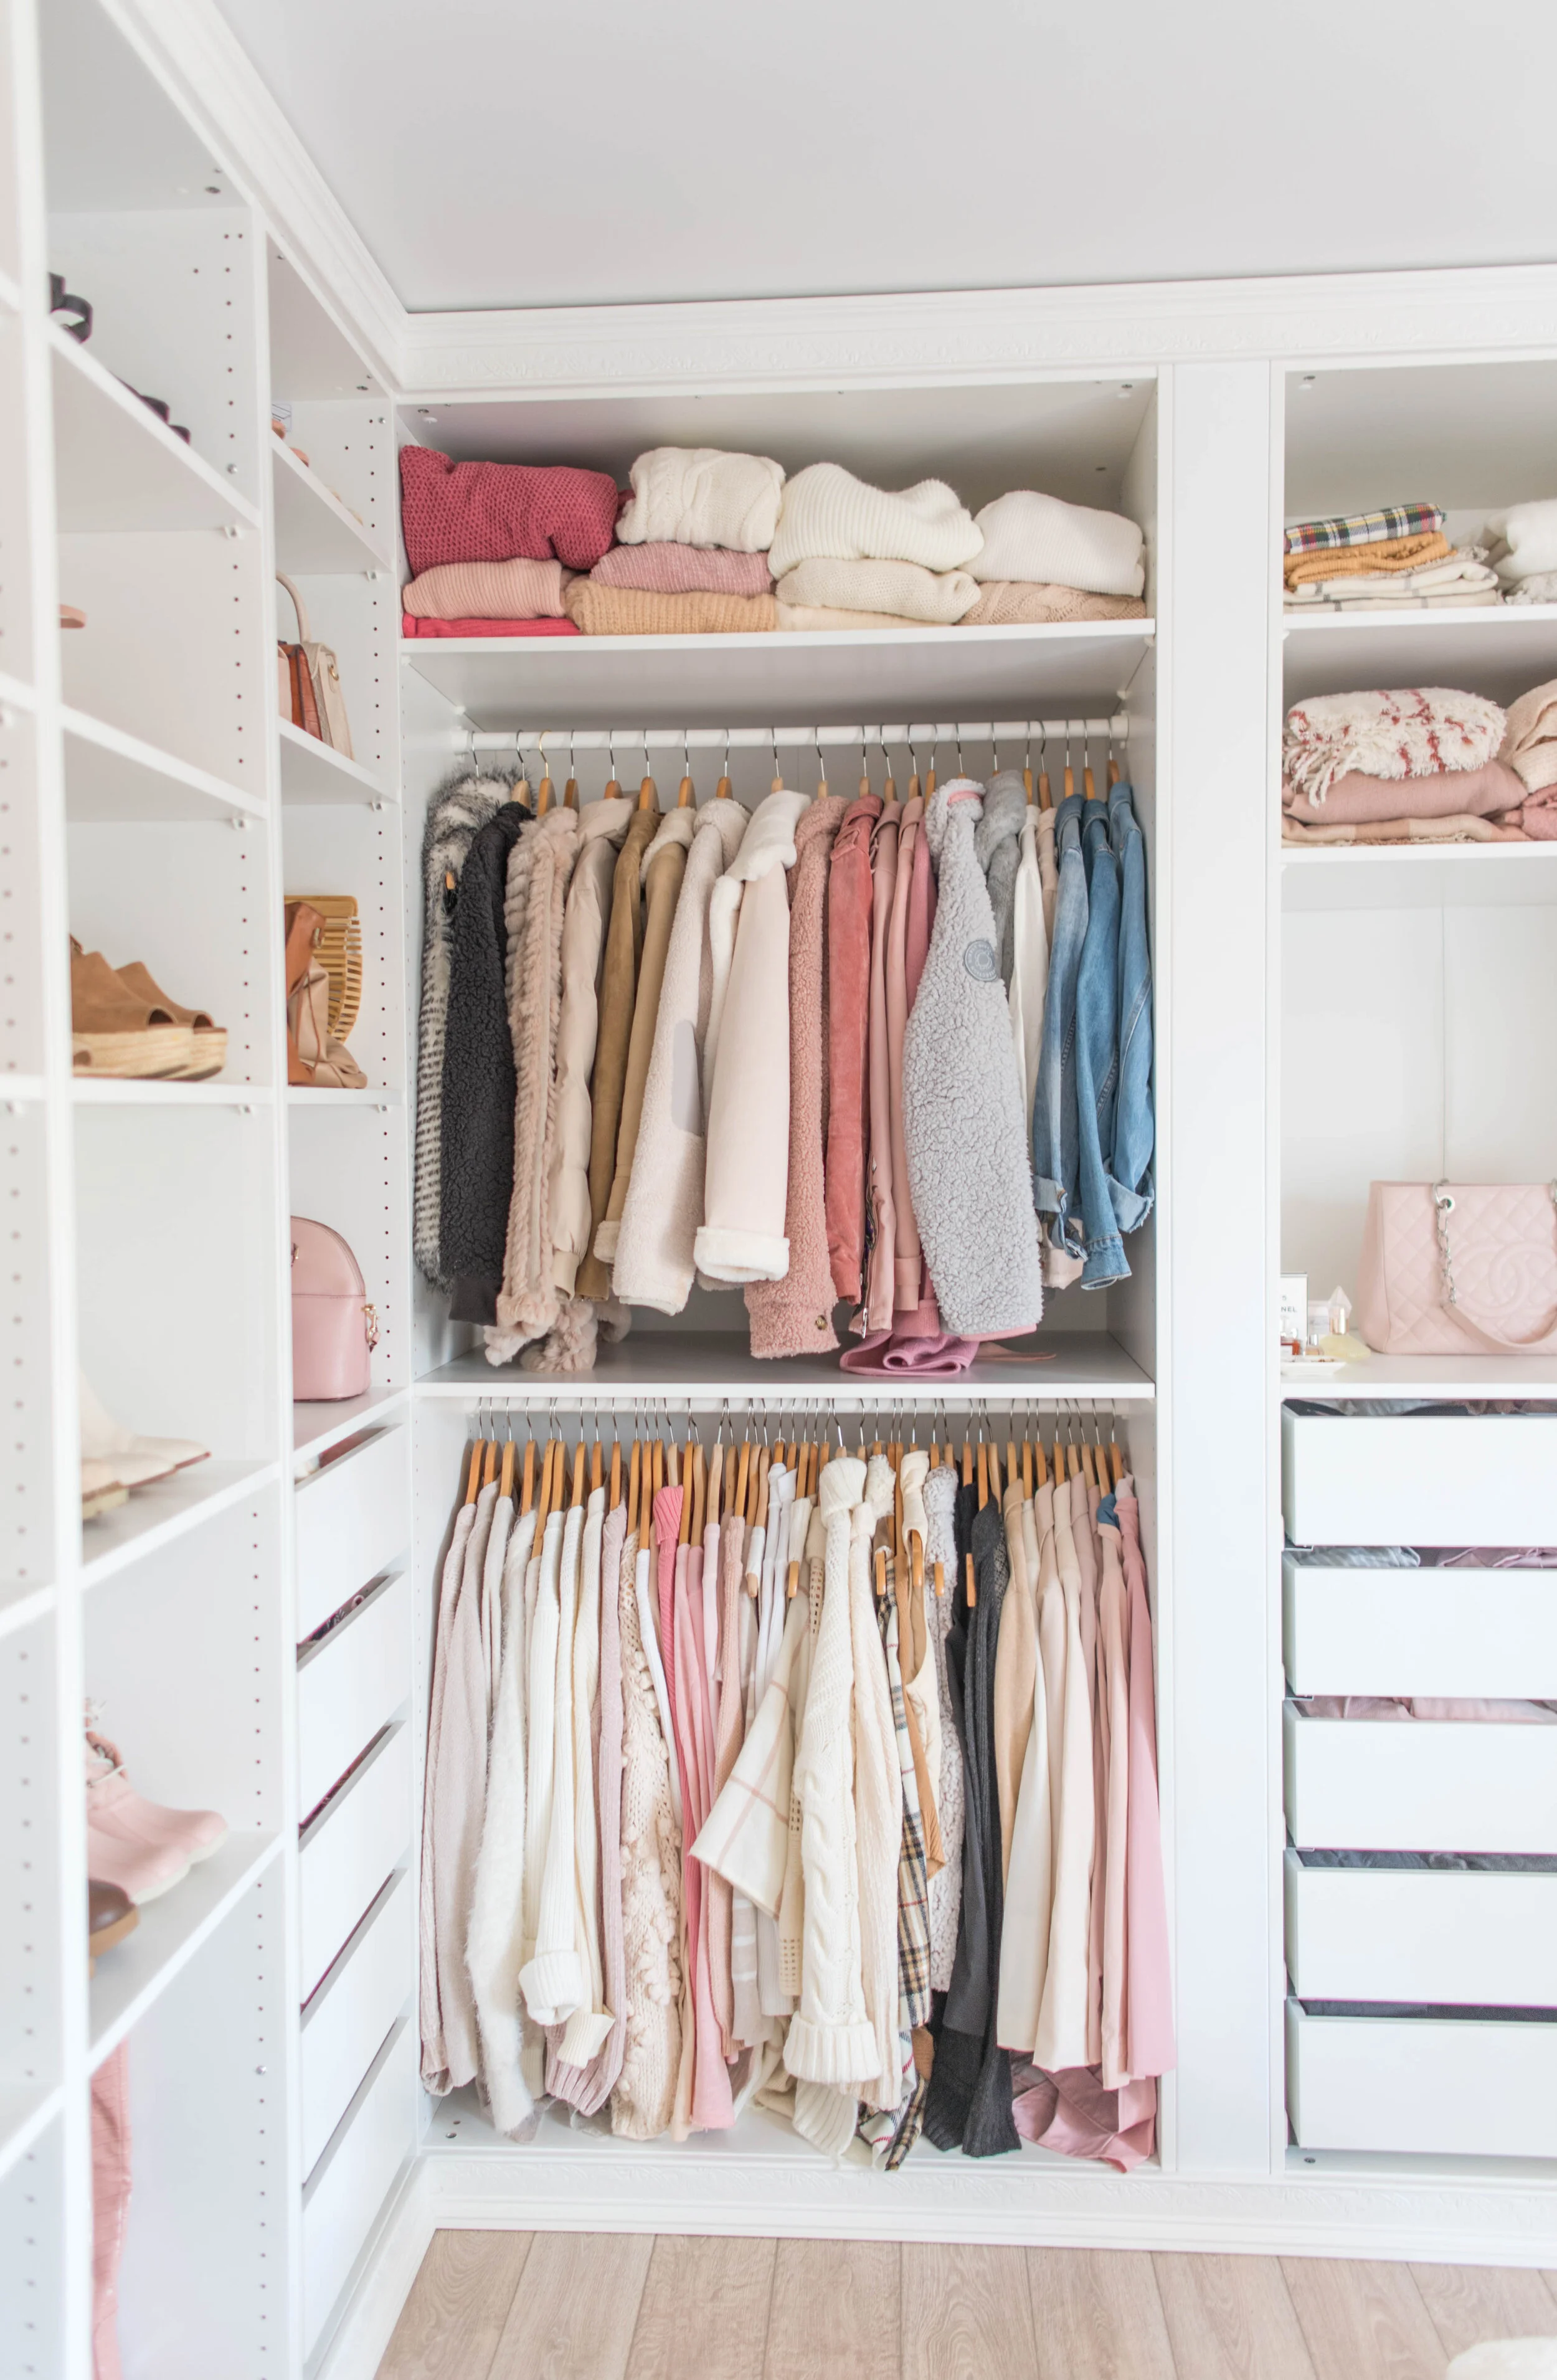
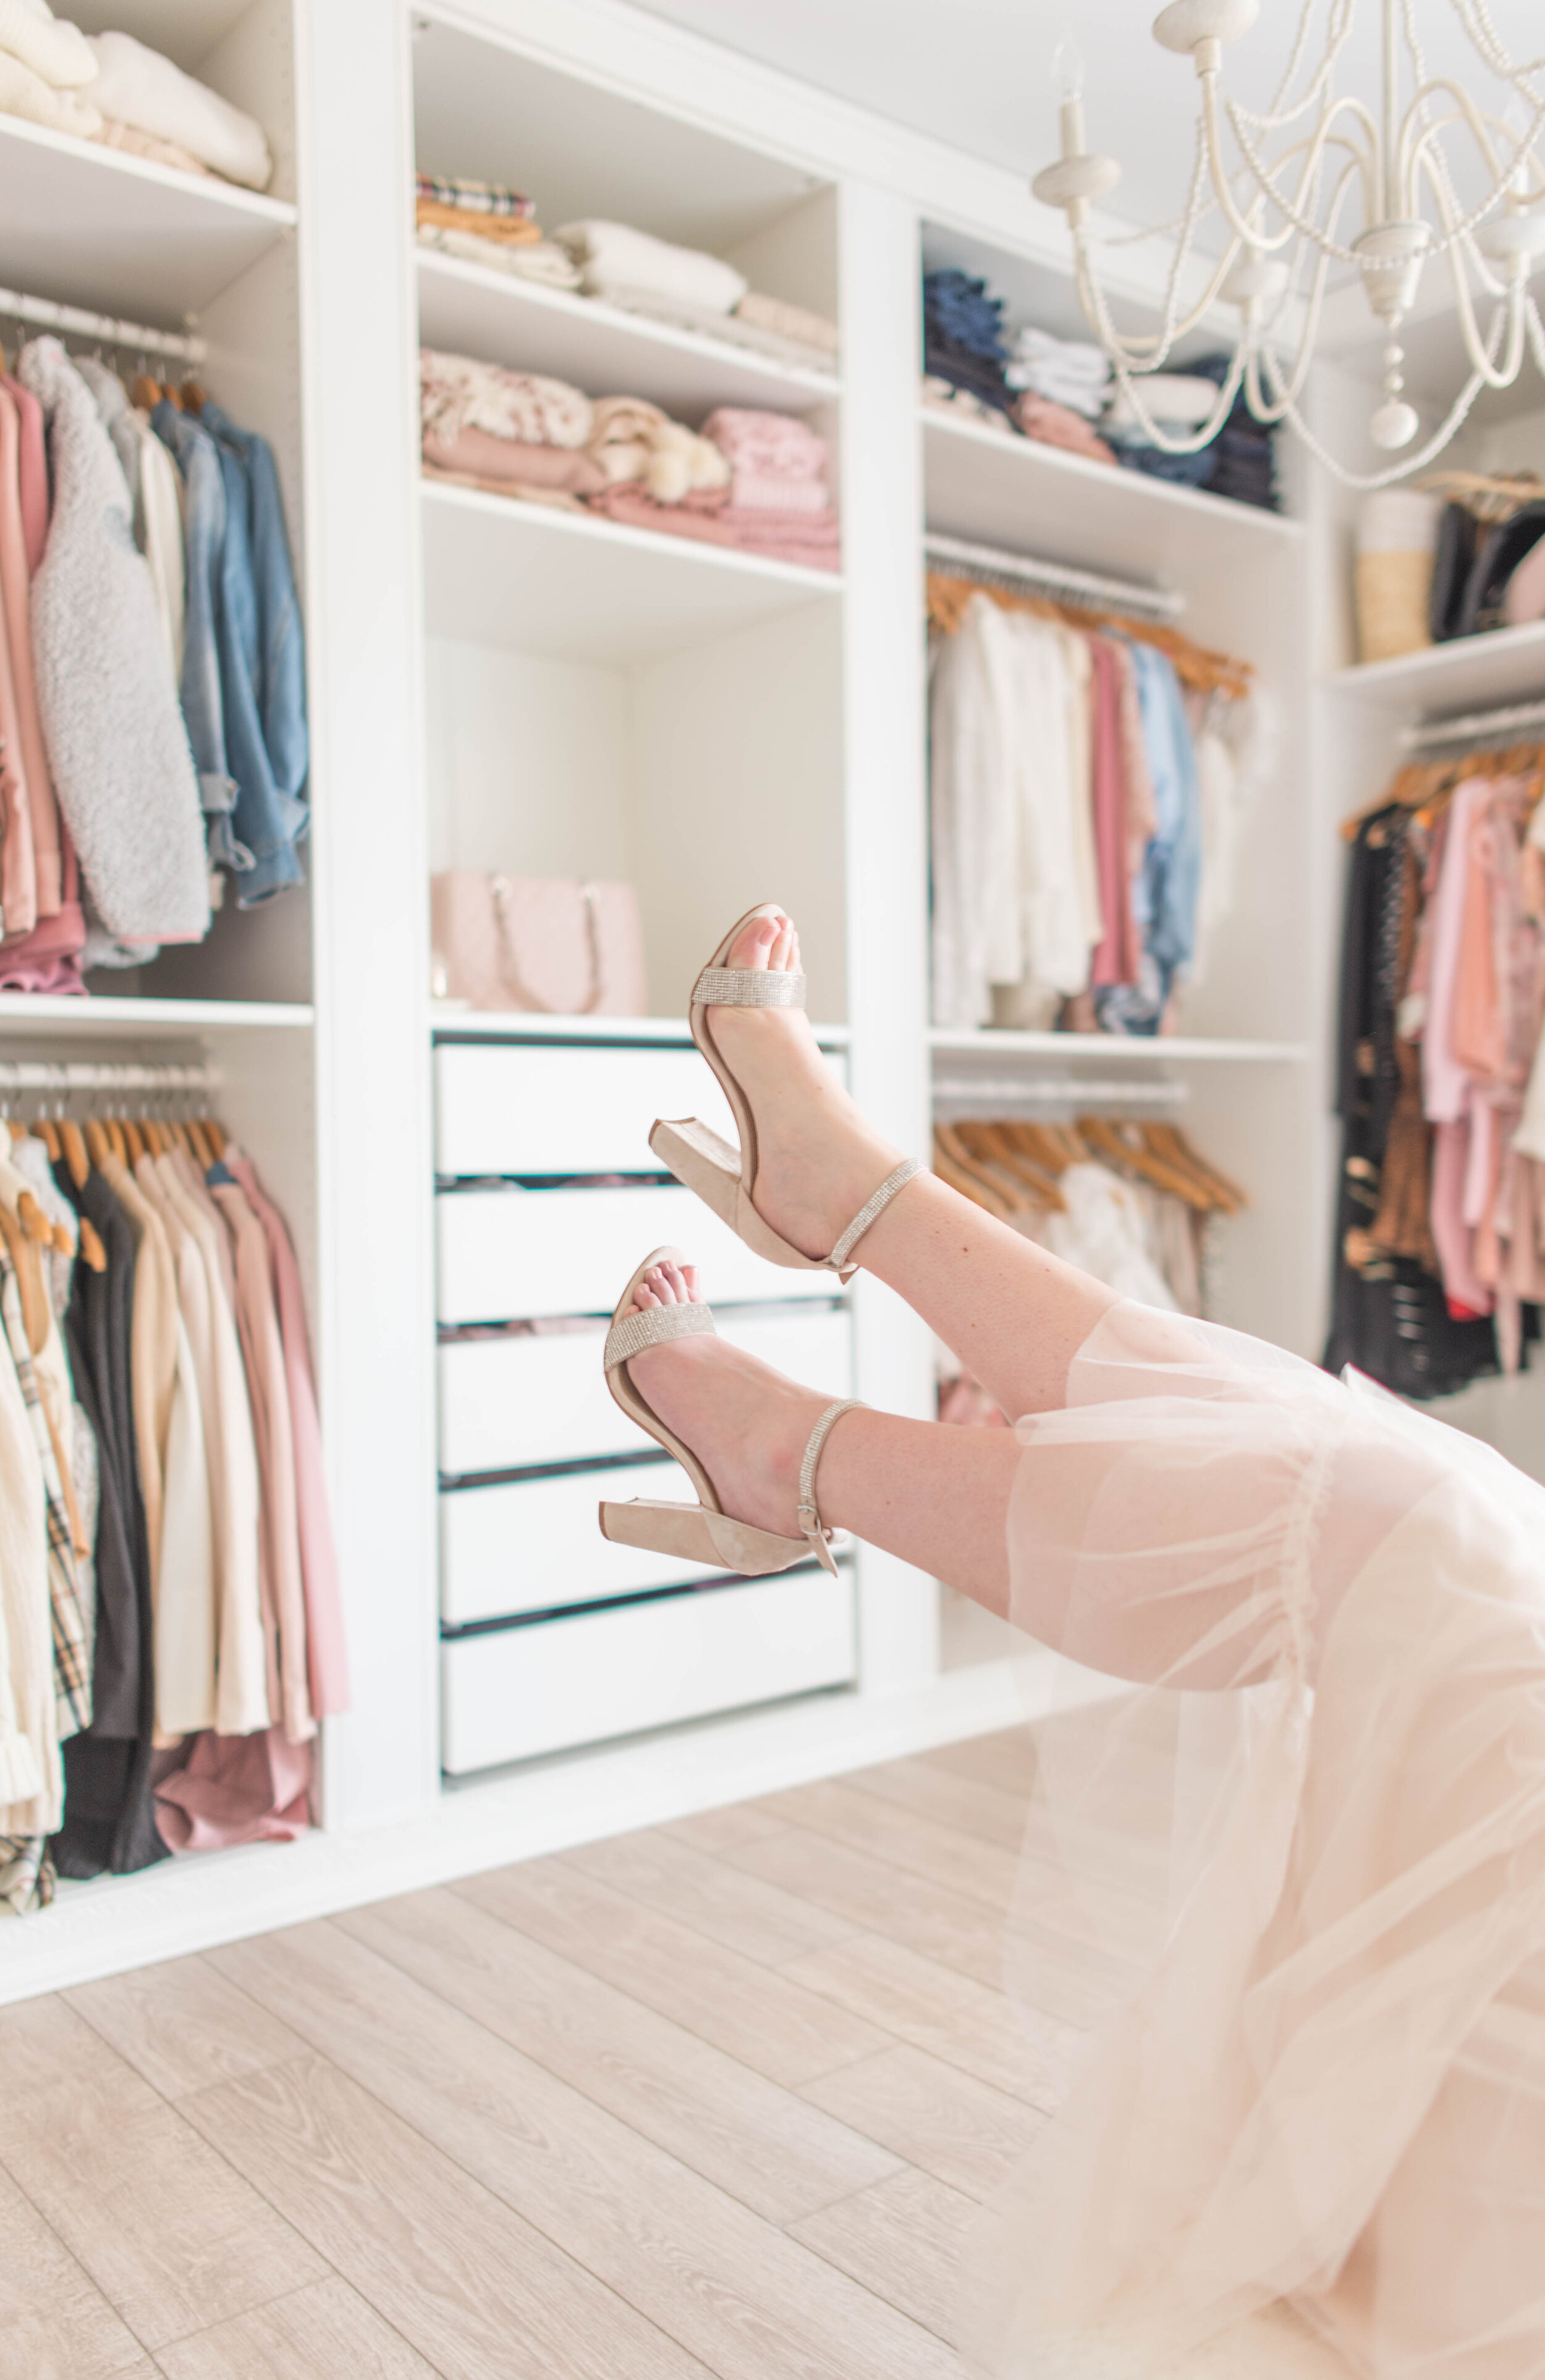
Lastly, I added this ivory sherpa ottoman to center the room and give me something to sit on when putting on shoes and provide enough height to reach my clothes and accessories placed on the higher shelves.

Did you enjoy my walk-in closet reveal? Comment below or on my latest Instagram post (@lifestylebyannaelizabeth) and let me know!
Want more home-related posts? Check out 17 DIY Projects for First-Time Homebuyers and Home Decor Pieces I’m Loving Right Now.
Lastly, do you want some inbox love? Get the special treatment: exclusive content, sales I'm loving, new blog posts, social media, & more. Join our email list now!
xo Anna Elizabeth